大数据之Phoenix与Hbase集成

前言

Phoenix是构建在HBase上的一个SQL层,能让我们用标准的JDBC APIs而不是HBase客户端APIs来创建表,插入数据和对HBase数据进行查询。
Phoenix完全使用Java编写,作为HBase内嵌的JDBC驱动。Phoenix查询引擎会将SQL查询转换为一个或多个HBase扫描,并编排执行以生成标准的JDBC结果集。

直接使用HBase API、协同处理器与自定义过滤器,对于简单查询来说,其性能量级是毫秒,对于百万级别的行数来说,其性能量级是秒。
Phoenix通过以下方式使我们可以少写代码,并且性能比我们自己写代码更好:

将SQL编译成原生的HBase scans。
确定scan关键字的最佳开始和结束让scan并行执行

本文使用 HBase2.1.10 + Phoenix5.1.2

Phoenix安装

下载与安装

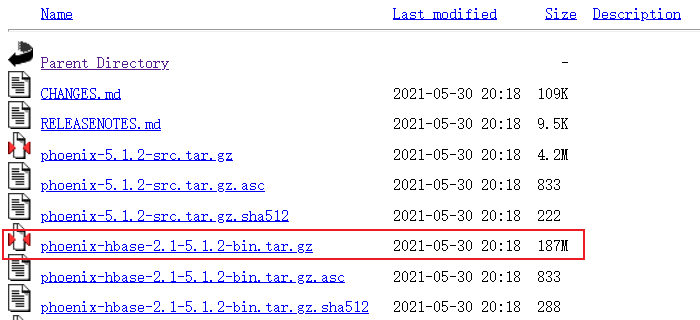
http://archive.apache.org/dist/phoenix/phoenix-5.1.2/

image-20221215092930316

解压

1
2
tar -zxvf phoenix-hbase-2.1-5.1.2-bin.tar.gz -C /data/tools/bigdata/
cd /data/tools/bigdata/phoenix-hbase-2.1-5.1.2-bin

环境变量

环境变量

1
cd /etc/profile.d/

创建配置文件

1
vi /etc/profile.d/phoenix.sh

内容设置为

1
2
3
# phoenix
export PHOENIX_HOME=/data/tools/bigdata/phoenix-hbase-2.1-5.1.2-bin
export PATH=$PATH:$PHOENIX_HOME/bin

配置生效

1
source /etc/profile

查看是否生效

1
cd $PHOENIX_HOME

配置

Phoenix用来连接Hbase,不用做分布式部署。

把Jar复制到Hbase里

1
2
cd $PHOENIX_HOME
cp phoenix-server-hbase-2.1-5.1.2.jar $HBASE_HOME/lib/

注意不要复制phoenix-pherf-5.1.2.jar这个Jar包,会导致重复而无法启动Hbase。

查看是否复制成功

1
2
cd $HBASE_HOME/lib/
ls | grep phoenix

Hbase配置添加

1
vi $HBASE_HOME/conf/hbase-site.xml

添加

1
2
3
4
5
6
7
8
9
<!-- Phoenix 支持HBase 命名空间映射 -->
<property>
<name>phoenix.schema.isNamespaceMappingEnabled</name>
<value>true</value>
</property>
<property>
<name>phoenix.schema.mapSystemTablesToNamespace</name>
<value>true</value>
</property>

配置文件软连接

1
2
cd $PHOENIX_HOME
ln -sf $HBASE_HOME/conf/hbase-site.xml bin/

同步分发Hbase Phoenix不用分发

1
ha-fenfa.sh $HBASE_HOME

运行

查看所有服务

1
ha-call.sh "jps"

停止Hbase

1
$HBASE_HOME/bin/stop-hbase.sh

如果哪个节点没有停止,我们手动停止

1
2
3
4
ssh hadoop01 "hbase-daemon.sh stop regionserver"
ssh hadoop02 "hbase-daemon.sh stop master"
ssh hadoop02 "hbase-daemon.sh stop regionserver"
ssh hadoop03 "hbase-daemon.sh stop regionserver"

清除zookeeper 信息

1
zkCli.sh -server hadoop01:2181 <<< "deleteall /hbase"

清除HDFS 数据

1
hadoop fs -rm -r /hbase

/hbase来自于hbase的配置文件中

image-20230129111526397

启动Hbase

1
$HBASE_HOME/bin/start-hbase.sh

连接Phoenix Shell

启动 Zookeeper => HDFS => Yarn => HBase

1
sqlline.py hadoop01,hadoop02,hadoop03:2181

第一次启动比较慢,请耐心等待。

查询

1
2
!tables
!quit

Phoenix Shell操作

连接

连接phoenix客户端

1
sqlline.py hadoop01,hadoop02,hadoop03:2181

Schema的操作

1)创建schema
默认情况下,在phoenix中不能直接创建schema。

需要将如下的参数添加到Hbase中conf目录下的hbase-site.xml 和 phoenix中bin目录下的 hbase-site.xml中

1
2
3
4
<property>
<name>phoenix.schema.isNamespaceMappingEnabled</name>
<value>true</value>
</property>

重新启动Hbase和

1
2
stop-hbase.sh
start-hbase.sh

查看所有schema

1
!schema

创建schema

1
create schema "zdb";

注意:在phoenix中,schema名,表名,字段名等会自动转换为大写,若要小写,使用双引号,如"zdb"

执行如下命令使用这个新建的 schema:

1
use "zdb";

执行如下命令则使用默认的 schema:

1
USE DEFAULT;

执行如下命令可以删除 zdb 这个 schema:

注意:确保该 schema 下的表都已删除,否则该 schema 会删除失败。

1
DROP SCHEMA "zdb";

SQL语法

显示所有表

1
2
3
4
5
!table
# 或
!tables

use "zdb";

创建表

创建表的时候一定要设置主键,这个会作为RowKey使用。

直接指定单个列作为RowKey

1
2
3
4
5
CREATE TABLE IF NOT EXISTS "tuser"(
id VARCHAR primary key,
name VARCHAR,
addr VARCHAR
);

指定多个列的联合作为RowKey

1
2
3
4
5
6
CREATE TABLE IF NOT EXISTS us_population (
State CHAR(2) NOT NULL,
City VARCHAR NOT NULL,
Population BIGINT
CONSTRAINT my_pk PRIMARY KEY (state, city)
);

插入数据

1
2
3
upsert into "tuser" values('1001','zhangsan','beijing');
upsert into "tuser" values('1002','lisi','上海');
upsert into "tuser"(id,name,address) values('1002','lisi','上海');

查询记录

1
2
3
select * from "tuser";
select * from "tuser" where id='1001';
select * from "tuser" where addr like '上%';

分页查询

1
2
select * from "tuser" order by id desc limit 1 offset 0;
select * from "tuser" order by id desc limit 1 offset 1;

其中

  • limit 取多少条
  • offset 从多少条开始

在Hbase中查看

1
2
3
4
hbase shell

list
scan 'zdb:tuser', {FORMATTER => 'toString'}

索引

查看是否用到索引

1
2
3
explain select * from "tuser";
explain select * from "tuser" where id='1001';
explain select * from "tuser" where name='zhangsan';

只要出现FULL SCAN就证明没用用到索引

创建索引

1
CREATE INDEX "index_tuser_name" ON "zdb"."tuser"(name);

删除索引

1
DROP INDEX "index_tuser_name" ON "zdb"."tuser";

如果创建二级索引报错

Mutable secondary indexes must have the hbase.regionserver.wal.codec property

停止hbase

1
$HBASE_HOME/bin/stop-hbase.sh

在每个regionServer的hbase-site.xml添加以下语句:

1
2
3
4
<property> 
<name>hbase.regionserver.wal.codec</name>
<value>org.apache.hadoop.hbase.regionserver.wal.IndexedWALEditCodec</value>
</property>

分发配置

1
2
ha-call.sh "rm -rf $HBASE_HOME/logs/*"
ha-fenfa.sh $HBASE_HOME

重启hbase即可

1
$HBASE_HOME/bin/start-hbase.sh

也要重启queryserver

1
2
queryserver.py stop
queryserver.py start

删除记录

1
delete from "tuser" where id='1001';

删除表

1
drop table "tuser";

7)退出命令行

1
!quit

表的映射

默认情况下:

  • Phoenix中创建的表在HBase中是可以看到的。

  • 直接在HBase中创建的表,通过Phoenix是查看不到的。

1)表的关系

如果要在Phoenix中操作直接在HBase中创建的表,则需要在Phoenix中进行表的映射。

映射方式有两种:

  • 视图映射
  • 表映射。

2)命令行中创建表test
HBase 中test的表结构如下,两个列族info1、info2。

Rowkey info1 info2
id name address

启动HBase Shell

1
hbase shell

创建HBase表test

1
create 'test','info1','info2'

3)视图映射
Phoenix创建的视图是只读的,所以只能用来做查询,无法通过视图对源数据进行修改等操作。

在phoenix中创建关联test表的视图

1
create view "test"(id varchar primary key,"info1"."name" varchar, "info2"."address" varchar);

删除视图

1
drop view "test";

4)表映射
使用Apache Phoenix创建对HBase的表映射,有两种方法:

  1. HBase中不存在表时,可以直接使用create table指令创建需要的表,系统将会自动在Phoenix和HBase中创建同名的表,并会根据指令内的参数对表结构进行初始化。
  2. 当HBase中已经存在表时,可以以类似创建视图的方式创建关联表,只需要将create table改为create view即可。
1
2
create table "test"(id varchar primary key,"info1"."name" varchar, "info2"."address" varchar) column_encoded_bytes=0;
create view "test"(id varchar primary key,"info1"."name" varchar, "info2"."address" varchar) column_encoded_bytes=0;

表映射中数值类型的问题

Hbase中存储数值类型的值(如int,long等)会按照正常数字的补码进行存储. 而phoenix对数字的存储做了特殊的处理. phoenix 为了解决遇到正负数同时存在时,导致负数排到了正数的后面(负数高位为1,正数高位为0,字典序0 < 1)的问题。

phoenix在存储数字时会对高位进行转换.原来为1,转换为0, 原来为0,转换为1.
因此,如果hbase表中的数据的写是由phoenix写入的,不会出现问题,因为对数字的编解码都是phoenix来负责。

如果hbase表中的数据不是由phoenix写入的,数字的编码由hbase负责. 而phoenix读数据时要对数字进行解码。 因为编解码方式不一致。导致数字出错。

1) 在hbase中创建表,并插入数值类型的数据

1
2
create 'person','info'
put 'person','1001', 'info:salary',Bytes.toBytes(123456)

注意: 如果要插入数字类型,需要通过Bytes.toBytes(123456)来实现。

2)在phoenix中创建映射表并查询数据

1
2
3
create table "person"(id varchar primary key,"info"."salary" integer) column_encoded_bytes=0;

select * from "person"

会发现数字显示有问题

3) 解决办法:
在phoenix中创建表时使用无符号的数值类型unsigned_long

1
create table "person"(id varchar primary key,"info"."salary" unsigned_long) column_encoded_bytes=0;

Phoenix Query Server

在 4.4-4.14 和5.0 releases 中 query server 及其 JDBC client 是内置的.

4.15以后 及5.1 release版本,Phoenix Query Server 需要单独下载, 版本号为 6.0.

下载及安装

下载地址:Download page

image-20230128163316469

1
2
tar -zxvf phoenix-queryserver-6.0.0-bin.tar.gz -C /root/
cp -rn /root/phoenix-queryserver-6.0.0/* $PHOENIX_HOME/

启动query server

1
2
3
queryserver.py start

lsof -i:8765

测试

1
sqlline-thin.py http://hadoop01:8765

停止

1
queryserver.py stop

Java操作

Phoenix分为胖客户端和瘦客户端

  • 瘦客户端通过Phoenix Query Server 来解析SQL语言。
  • 胖客户端对SQL解析=>Hbase读写原理API=>直接作用于Zookeeper

Thin Client(瘦客户端)

1)启动query server

1
2
3
queryserver.py start

lsof -i:8765

2)创建项目并导入依赖

1
2
3
4
5
<dependency>
<groupId>org.apache.phoenix</groupId>
<artifactId>phoenix-queryserver-client</artifactId>
<version>6.0.0</version>
</dependency>

3)编写代码

1
2
3
4
5
6
7
8
9
10
11
12
13
14
15
16
17
18
import java.sql.*;

public class PhoenixTest {
public static void main(String[] args) throws SQLException, ClassNotFoundException {
Class.forName("org.apache.phoenix.queryserver.client.Driver");
String url = "jdbc:phoenix:thin:url=http://192.168.7.101:8765;serialization=PROTOBUF";
Connection conn = DriverManager.getConnection(url);
Statement st = conn.createStatement();
String sql = "select * from \"zdb\".\"tuser\"";
ResultSet rs = st.executeQuery(sql);
while (rs.next()) {
System.out.println("id=" + rs.getString("id") + ";name=" + rs.getString("name"));
}
rs.close();
st.close();
conn.close();
}
}

添加数据

1
2
3
4
5
6
7
8
9
10
11
12
13
14
15
import java.sql.*;

public class PhoenixTest {
public static void main(String[] args) throws SQLException {
Connection conn = DriverManager.getConnection("jdbc:phoenix:thin:url=http://192.168.7.101:8765;serialization=PROTOBUF");
Statement st = conn.createStatement();
String sql = "upsert into MDB.TUSER(ID,NAME) VALUES ('" + 1005 + "','" + "wangwu" + "')";
System.out.println("Running: " + sql);
int i = st.executeUpdate(sql);
System.out.println(i);
conn.commit();
st.close();
conn.close();
}
}

Thick Client(胖客户端)

1)在pom中加入依赖

1
2
3
4
5
6
7
8
9
10
11
<dependency>
<groupId>org.apache.phoenix</groupId>
<artifactId>phoenix-core</artifactId>
<version>5.1.2</version>
</dependency>

<dependency>
<groupId>org.apache.phoenix</groupId>
<artifactId>phoenix-hbase-compat-2.1.6</artifactId>
<version>5.1.2</version>
</dependency>

2)编写代码

1
2
3
4
5
6
7
8
9
10
11
12
13
14
15
16
17
18
19
20
21
22
23
24
25
26
27
28
29
30
31
32
33
34
35
36
package com.xhkjedu;

import org.apache.phoenix.jdbc.PhoenixDriver;

import java.sql.*;
import java.util.Properties;

public class PhoenixTest {
public static void main(String[] args) throws Exception {
Properties properties = getProp();
PhoenixDriver instance = PhoenixDriver.INSTANCE;
Connection conn;

try {
conn = instance.connect("jdbc:phoenix:hadoop01,hadoop02,hadoop03:2181", properties);
PreparedStatement ps = conn.prepareStatement("select * from \"zdb\".\"tuser\"");
ResultSet rs = ps.executeQuery();
while (rs.next()) {
System.out.println(rs.getString(1) + ":" + rs.getString(2));
}
} catch (SQLException e) {
e.printStackTrace();
}
}

private static Properties getProp() {
Properties prop = new Properties();
prop.put("phoenix.schema.isNamespaceMappingEnabled", "true");
prop.put("username", "");
prop.put("password", "");
prop.put("initialSize", 20);
prop.put("maxActive", 0);
prop.put("defaultAutoCommit", true);
return prop;
}
}

Phoenix二级索引

1. 二级索引配置文件

添加如下配置到HBase的HRegionserver节点的hbase-site.xml

1
2
3
4
5
6
7
8
9
10
11
12
13
14
15
16
17
<!-- phoenix regionserver 配置参数-->
<property>
<name>hbase.regionserver.wal.codec</name>
<value>org.apache.hadoop.hbase.regionserver.wal.IndexedWALEditCodec</value>
</property>

<property>
<name>hbase.region.server.rpc.scheduler.factory.class</name>
<value>org.apache.hadoop.hbase.ipc.PhoenixRpcSchedulerFactory</value>
<description>Factory to create the Phoenix RPC Scheduler that uses separate queues for index and metadata updates</description>
</property>

<property>
<name>hbase.rpc.controllerfactory.class</name>
<value>org.apache.hadoop.hbase.ipc.controller.ServerRpcControllerFactory</value>
<description>Factory to create the Phoenix RPC Scheduler that uses separate queues for index and metadata updates</description>
</property>

2. 全局二级索引

Global Index是默认的索引格式,创建全局索引时,会在HBase中建立一张新表。

也就是说索引数据和数据表是存放在不同的表中的,因此全局索引适用于多读少写的业务场景。
写数据的时候会消耗大量开销,因为索引表也要更新,而索引表是分布在不同的数据节点上的,跨节点的数据传输带来了较大的性能消耗。
在读数据的时候Phoenix会选择索引表来降低查询消耗的时间。

1.创建单个字段的全局索引

1
CREATE INDEX my_index ON my_table (my_col);

如果想查询的字段不是索引字段的话索引表不会被使用,也就是说不会带来查询速度的提升。

2.创建携带其他字段的全局索引

1
CREATE INDEX my_index ON my_table (v1) INCLUDE (v2);

3. 本地二级索引

Local Index适用于写操作频繁的场景。
索引数据和数据表的数据是存放在同一张表中(且是同一个Region),避免了在写操作的时候往不同服务器的索引表中写索引带来的额外开销。

1
CREATE LOCAL INDEX my_index ON my_table (my_column);

DBeaver连接

DBeaver中搜索phoenix

修改DBeaver配置

修改dbeaver.ini文件,增加如下内容

1
2
-vm
D:/Tools/Java/jdk1.8.0_102/bin

连接配置

连接属性
image-20221215135637569

驱动属性中也添加

属性

1
phoenix.schema.isNamespaceMappingEnabled

1
true

自动下载的Jar版本较老

我们要引用对应版本的Jar

1
phoenix-client-hbase-2.1-5.1.2.jar

服务配置

如果报错

CATALOG is found but client does not have phoenix.schema.isNamespaceMappingEnabled enabled

查询

1
select * from SYSTEM."CATALOG";

查看表的 TABLE_SCHEM 发现有些表这个属性为空。 那么如果你没有指定自动映射命名空间,就会报错。

image-20221215130549298

在 hbase 的 conf 目录下 hbase-site.xml 文件加入下面的属性:

1
2
3
4
<property>
<name>phoenix.schema.isNamespaceMappingEnabled</name>
<value>true</value>
</property>

然后,重启 hbase。