Jetpack Compose-Canvas图形绘制
前言
DrawScope点进去查看代码,主要有如下几个方法
- drawLine 画线
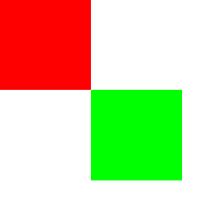
- drawRect 画矩形
- drawRoundRect 画圆角矩形
- drawImage 绘制图片
- drawCircle 画圆形
- drawOval 画椭圆形
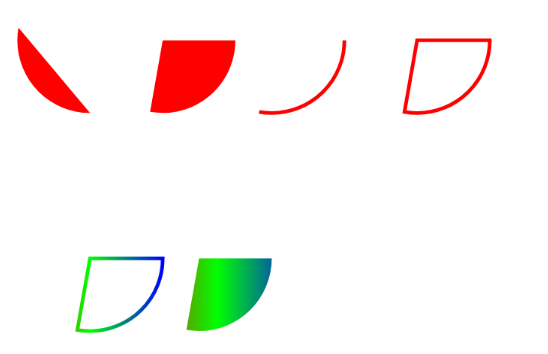
- drawArc 画弧度跟扇形
- drawPath 画路径
- drawPoints 画点 还有如下几个扩展方法
- inset 将DrawScope坐标空间平移
- translate 平移坐标
- rotate(旋转坐标)讲的是旋转了多少角度,rotateRad(旋转坐标)讲的是旋转了多少弧度
- scale 缩放坐标
- clipRect 裁剪矩形区域,绘制在裁剪好的矩形区域内。ClipOp.Difference从当前剪辑中减去提供的矩形。
- clipPath 裁剪路径
- drawIntoCanvas 直接提供底层画布
- withTransform 组合转换
绘制文字
方式1
1 | val textMeasure = rememberTextMeasurer() |
方式2(推荐)
这种方式比较稳定,用上面的方式有时绘制的时候会报错。
在使用 drawText 方法绘制文字时,你传递给它的坐标(通常是 x 和 y 参数)指定的是字符串基线(baseline)的起始点位置。
在 Android 的绘图系统中,基线是文本行中字母坐在上面的不可见线。这意味着:
- X 坐标:决定了文本开始绘制的位置,在水平方向上从左到右。
- Y 坐标:指定了文本基线的位置,在垂直方向上的定位。
1 | val paint = Paint().apply { |
左右居中
1 | val paint = androidx.compose.ui.graphics.Paint().asFrameworkPaint().apply { |
上下左右都居中
1 | private fun DrawScope.drawLabelCenter( |
测量文字的宽度
1 | private fun DrawScope.getTextWidth(text: String, textSizeSp: Float): Float { |
图形绘制
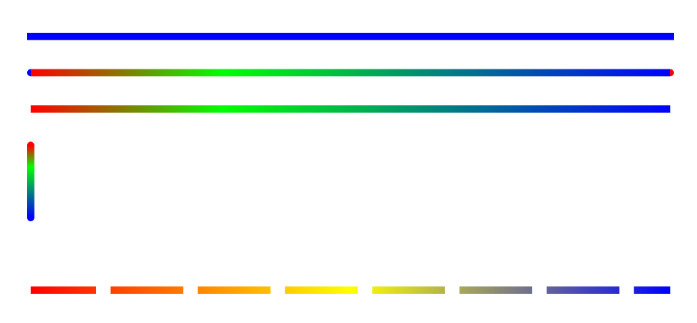
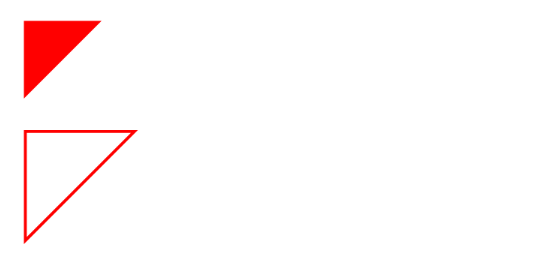
绘制线
1 | import androidx.compose.foundation.Canvas |
效果
绘制箭头
1 | private fun DrawScope.drawLineWhthArrow( |
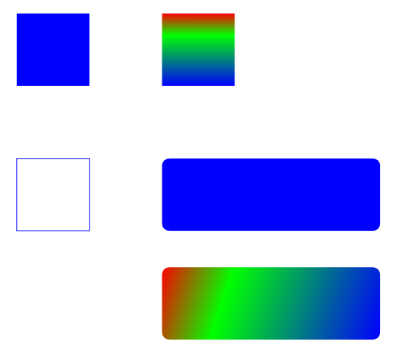
绘制矩形
1 | import androidx.compose.foundation.Canvas |
效果
绘制图片
1 | import androidx.compose.foundation.Canvas |
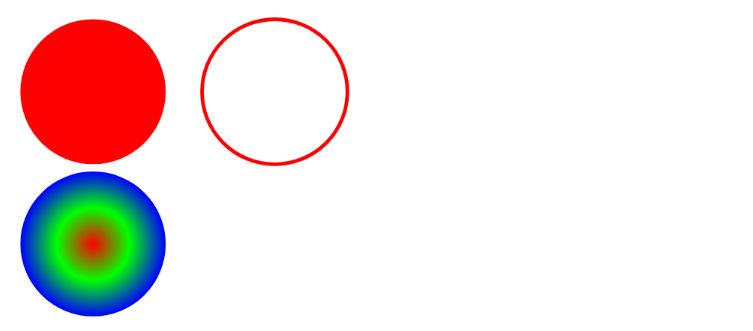
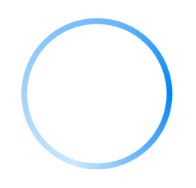
绘制圆形
绘制圆形
1 | import androidx.compose.foundation.Canvas |
效果
环渐变
1 | val color = Color(0xff0085F7) |
效果
绘制圆角矩形
填充绘制
1 | val strokeWidth = 10f // 线条宽度 |
边框绘制
1 | drawRoundRect( |
主要就是添加了
1 | style = Stroke(width = 4f) |
绘制椭圆
1 | import androidx.compose.foundation.Canvas |
绘制弧跟扇形
1 | import androidx.compose.foundation.Canvas |
效果
绘制路径
1 | import androidx.compose.foundation.Canvas |
效果
渐变
水平渐变
1 | drawCircle( |
垂直渐变
1 | drawCircle( |
径向渐变
从内到外进行渐变
1 | drawCircle( |
环状渐变
sweepGradient(扫描渐变,也称为锥形渐变)是一种围绕中心点呈扇形展开的渐变效果,类似于雷达扫描或色轮的渐变模式。
它的颜色从起始角度开始,按照顺时针方向环绕中心点逐渐过渡,形成一个完整的色彩圆环或扇形渐变。
1 | val color = Color(0xff0085F7) |
移动
inset 平移
inset是将DrawScope坐标空间平移
inset的代码如下:
1 | import androidx.compose.foundation.Canvas |
效果
translate 平移坐标
1 | import androidx.compose.foundation.Canvas |
效果

旋转
rotate(degrees = animHuan.value * 360f, pivot = centerPositionAnim)
其中
degrees:是旋转角度 取值范围 0-360pivot:是旋转的中心点
示例
1 | val animSelect = remember { Animatable(0.0f) } |
BlendMode混合模式
混合模式
混合是有个原图像src,一个dst目标图像,这两个图的相交区域的各种组合情况。
- Clear 清除 (删除源图像和目标图像,不留下任何内容)
- Src 删除目标图像,只绘制源图像
- Dst 删除源图像,只绘制目标图像
- SrcOver 源图和目标图合成,源图在上
- DstOver 目标图和源图合成,目标图在上
- SrcIn 显示源图和目标图相交的部分,并且只显示源图像
- DstIn 显示目标图和源图相交的部分,并且只显示目标图
- SrcOut 显示源图像和目标图不相交的部分,并且只显示源图
- DstOut 显示目标图和源图像不相交的部分,并且只显示目标图
- SrcAtop 显示目标图,并且在相交的地方显示源图
- DstAtop 显示源图,并在相交的地方显示目标图
- Xor 显示源图和目标图,但相交的位置不显示(代码注释:对源图像和目标图像应用按位异或运算符。这就使得它们重叠的地方保持透明。)
- Plus 对源映像和目标映像的组件求和。其中一个图像的像素中的透明度降低了该图像对相应输出像素的贡献,就好像该图像中该像素的颜色较暗一样
- Modulate 将源图像和目标图像的颜色分量相乘。这只能产生相同或较深的颜色(乘以白色,1.0,结果不变;乘以黑色(0.0,结果为黑色)。合成两个不透明图像时,这与在投影仪上重叠两个透明胶片的效果类似。对于同样乘以alpha通道的变量,请考虑乘以。
- Screen 将源图像和目标图像的分量的逆相乘,然后求逆结果。反转组件意味着完全饱和的通道(不透明白色)被视为值0.0,而通常被视为0.0(黑色,透明)的值被视为1.0。这基本上与调制混合模式相同,但是在乘法之前颜色值反转,结果在渲染之前反转回来。这只能产生相同或较浅的颜色(乘以黑色,1.0,结果不变;乘以白色(0.0,结果为白色)。类似地,在alpha通道中,它只能产生更不透明的颜色。这与两台投影仪同时在同一屏幕上显示图像的效果相似。
- Overlay 将源图像和目标图像的分量相乘,然后调整它们以支持目标。具体来说,如果目标值较小,则将其与源值相乘,而如果源值较小,则将源值的倒数与目标值的倒数相乘,然后反转结果。反转组件意味着完全饱和的通道(不透明白色)被视为值0.0,而通常被视为0.0(黑色,透明)的值被视为1.0。
- Darken 通过从每个颜色通道中选择最低值来合成源图像和目标图像。输出图像的不透明度的计算方法与SrcOver相同。
- Lighten 通过从每个颜色通道中选择最高值来合成源图像和目标图像。输出图像的不透明度的计算方法与SrcOver相同。
- ColorDodge 将目标除以源的倒数。反转组件意味着完全饱和的通道(不透明白色)被视为值0.0,而通常被视为0.0(黑色,透明)的值被视为1.0。注意这个BlendMode只能在androidapi级别29及以上使用
- ColorBurn :将目标的倒数除以源的倒数,然后求结果的倒数。反转组件意味着完全饱和的通道(不透明白色)被视为值0.0,而通常被视为0.0(黑色,透明)的值被视为1.0。注意这个BlendMode只能在androidapi级别29及以上使用
- Hardlight : 将源图像和目标图像的分量相乘,然后调整它们以有利于源图像。具体来说,如果源值较小,则将其与目标值相乘,而如果目标值较小,则将目标值的倒数与源值的倒数相乘,然后反转结果。反转组件意味着完全饱和的通道(不透明白色)被视为值0.0,而通常被视为0.0(黑色,透明)的值被视为1.0。注意这个BlendMode只能在androidapi级别29及以上使用
- Softlight: 对于低于0.5的源值,使用ColorDodge;对于高于0.5的源值,使用ColorBurn。这会产生类似的效果,但比叠加效果更柔和。注意这个BlendMode只能在androidapi级别29及以上使用
- Difference: 从每个通道的较大值中减去较小的值。合成黑没有效果;合成白色将反转其他图像的颜色。输出图像的不透明度的计算方法与SrcOver相同。注意这个BlendMode只能在androidapi级别29及以上使用这种影响类似于排斥,但更为严厉。
- Exclusion: 从两个图像的总和中减去两个图像乘积的两倍。合成黑没有效果;合成白色将反转其他图像的颜色。输出图像的不透明度的计算方法与SrcOver相同。注意这个BlendMode只能在androidapi级别29及以上使用效果类似于差异,但更柔和。
- Multiply: 将源图像和目标图像的分量相乘,包括alpha通道。这只能产生相同或较深的颜色(乘以白色,1.0,结果不变;乘以黑色(0.0,结果为黑色)。由于alpha通道也会相乘,因此一个图像中的完全透明像素(不透明度0.0)会导致输出中的完全透明像素。这与DstIn类似,但颜色组合在一起。
- Hue: 获取源图像的色调,以及目标图像的饱和度和亮度。其效果是用源图像着色目标图像。输出图像的不透明度的计算方法与SrcOver相同。在源图像中完全透明的区域从目标图像获取其色调。注意这个BlendMode只能在androidapi级别29及以上使用
- Saturation: 获取源图像的饱和度,以及目标图像的色调和亮度。输出图像的不透明度的计算方法与SrcOver相同。在源图像中完全透明的区域从目标图像获取其饱和度。注意这个BlendMode只能在androidapi级别29及以上使用
- Color :获取源图像的色调和饱和度,以及目标图像的亮度。其效果是用源图像着色目标图像。输出图像的不透明度的计算方法与SrcOver相同。源图像中完全透明的区域从目标处获取其色调和饱和度。注意这个BlendMode只能在androidapi级别29及以上使用
- Luminosity :获取源图像的亮度,以及目标图像的色调和饱和度。输出图像的不透明度的计算方法与SrcOver相同。在源图像中完全透明的区域从目标图像获取其亮度。注意这个BlendMode只能在androidapi级别29及以上使用
混合示例
1 | Canvas( |
注意
.graphicsLayer(alpha = 0.99f)这个比较重要,如果没有就没有透明区,导致所有的混合模式都无效,所有擦除的区域都变成了黑色。