TTS模型之F5-TTS
前言
镜像站
在线测试地址
https://huggingface.co/spaces/mrfakename/E2-F5-TTS
环境设置
python的环境管理工具conda
下载ffmpeg并添加环境变量。
部署
用conda创建虚拟环境
1 | # 创建一个Python 3.10的conda环境 (也可以使用virtualenv): |
安装PyTorch和Torchaudio依赖
1 | # 安装PyTorch和Torchaudio,CUDA版本根据你的显卡选择: |
其中这个下载比较慢我们可以自己下载
https://download.pytorch.org/whl/cu118/torch-2.3.0+cu118-cp310-cp310-win_amd64.whl
本地安装
1 | pip install "E:\tts\torch-2.3.0+cu118-cp310-cp310-win_amd64.whl" |
下载项目
1 | git clone https://github.com/SWivid/F5-TTS.git |
设置镜像
后续运行会自动从huggingface下载模型,这里设置下国内的镜像
也可以在这里下载
设置环境变量
Linux
1 | export HF_ENDPOINT=https://hf-mirror.com |
Windows
1 | HF_ENDPOINT = "https://hf-mirror.com" |
如图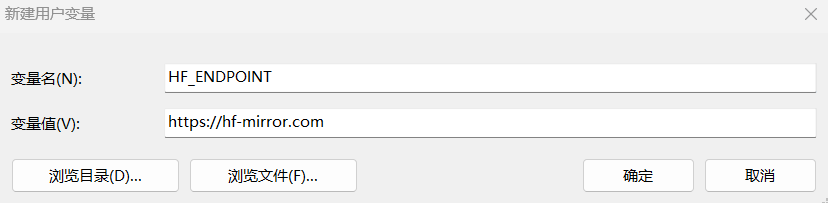
查看是否生效
1 | echo %HF_ENDPOINT% |
运行
使用Gradio App运行(启动WEB页面)
1 | # 本地运行 |