前言
本文环境
- python 3.8
- opencv-python 4.6.0.66
包管理器
安装包管理器
1
2
| pip install pipenv
pipenv install
|
添加opencv
1
| pipenv install opencv-python=4.6.0 -i https://pypi.tuna.tsinghua.edu.cn/simple
|
查看安装的依赖
安装所有配置文件中的依赖
运行
1
| pipenv run python main.py
|
人像识别
导入的时候使用
训练库
https://gitee.com/mirrors/opencv/tree/4.x/data/haarcascades
https://github.com/opencv/opencv/tree/master/data/haarcascades
1)对于人脸检测,OpenCV提供以下(从最宽松到最严格):
haarcascade_frontalface_default.xml
haarcascade_frontalface_alt.xml
haarcascade_frontalface_alt2.xml
haarcascade_frontalface_alt_tree.xml
2) 对于眼睛检测,我们可以选择两种方法:
原则
在识别的时候
如果是眼睛检测就最好是在单人并且主体是人像中找。
如果是人脸检测则主体要是人
否则识别效果特别差。
其中尝试了以下几个
haarcascade_frontalface_default.xml
haarcascade_frontalface_alt.xml
haarcascade_frontalface_alt2.xml
haarcascade_frontalface_alt_tree.xml
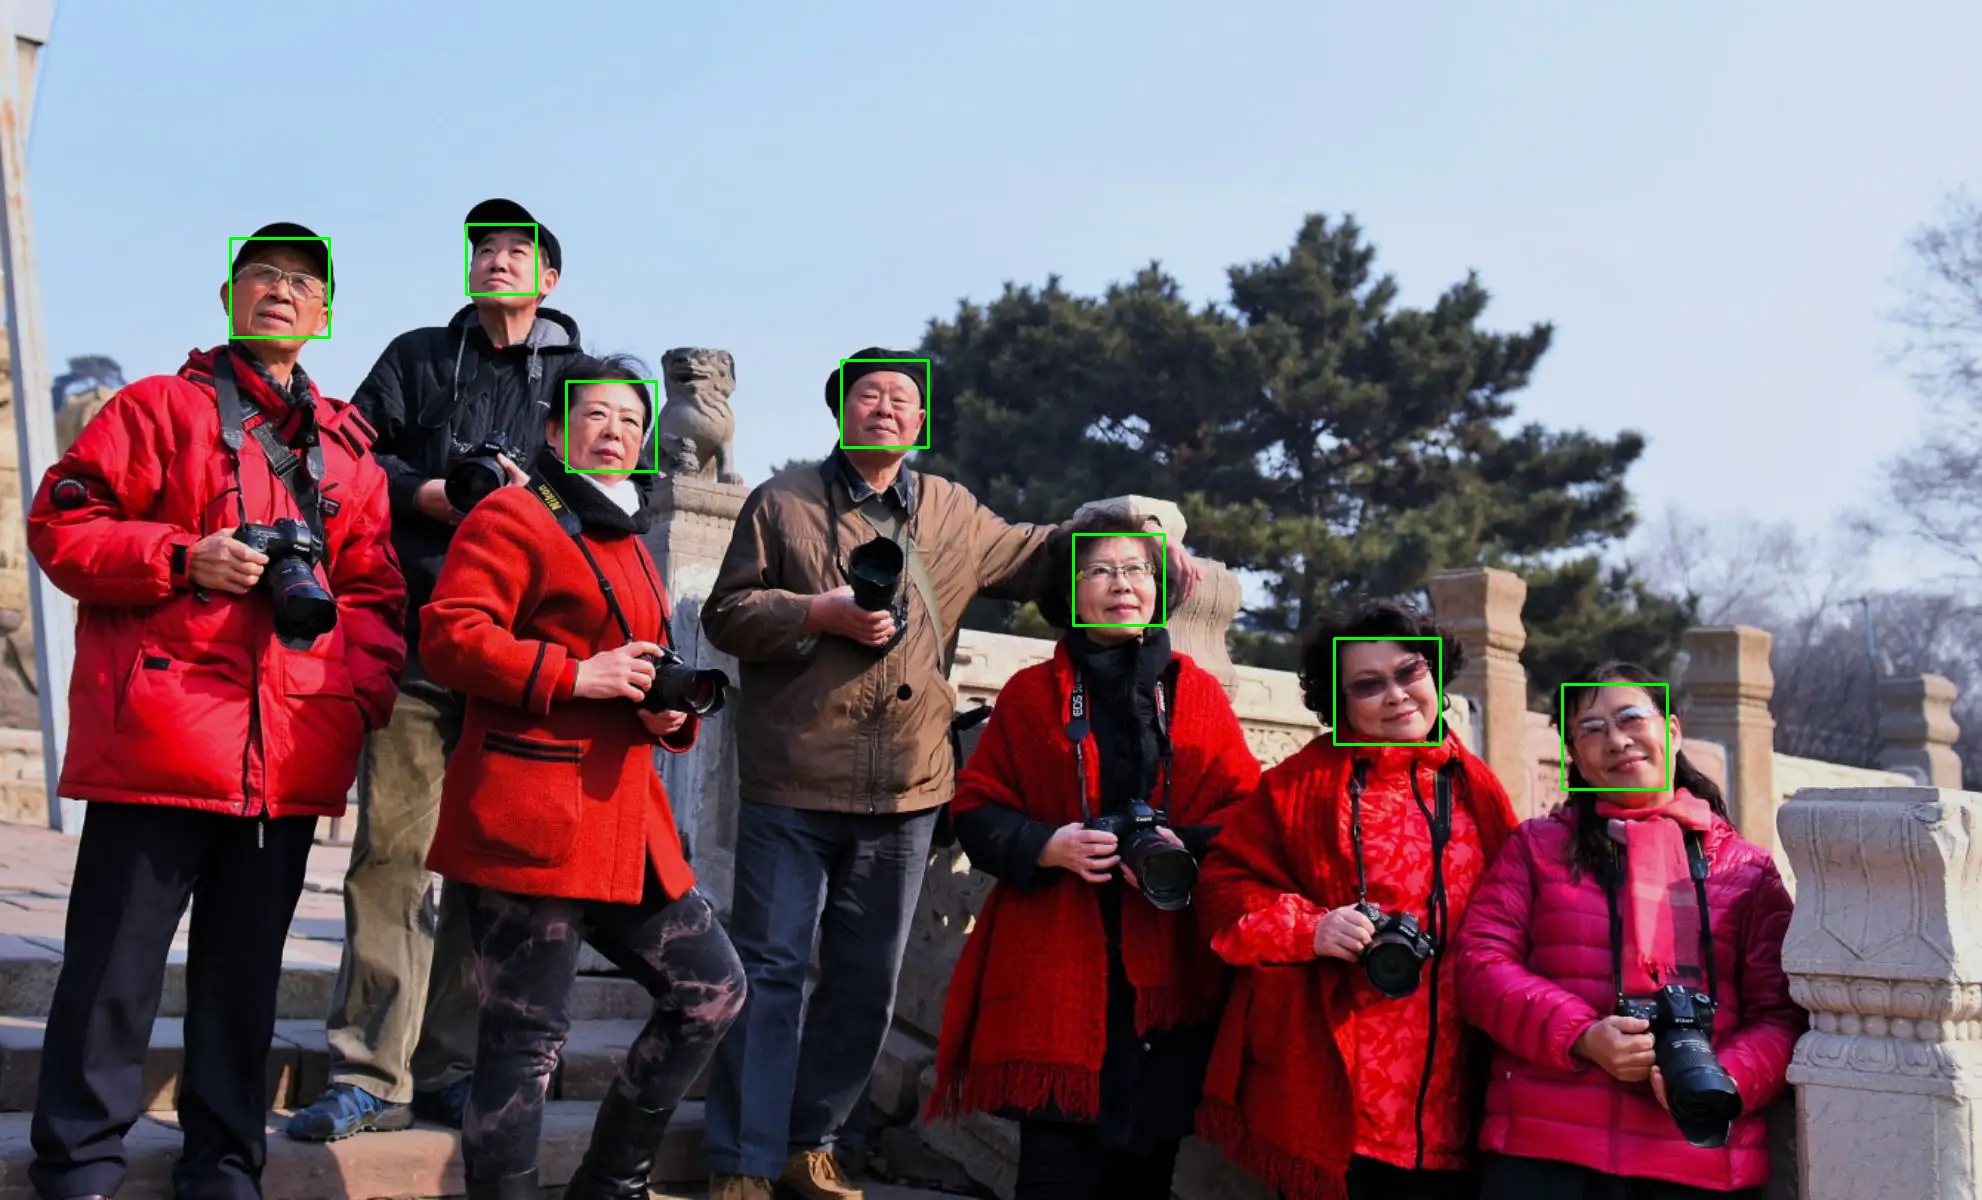
经测试haarcascade_frontalface_alt2.xml效果较好。
识别代码
1
2
3
4
5
6
7
8
9
10
11
12
13
14
15
16
17
18
| import cv2
image = cv2.imread('./imgs/01.png')
face_patterns = cv2.CascadeClassifier(r'.\xml\haarcascade_frontalface_alt2.xml')
faces = face_patterns.detectMultiScale(image, scaleFactor=1.1, minNeighbors=4, minSize=(6, 6))
print(faces)
for (x, y, w, h) in faces:
cv2.rectangle(image, (x, y), (x + w, y + h), (0, 255, 0), 2)
cv2.imwrite('./imgs/02.jpg', image)
|
识别前

识别后
OpenCV常用操作
窗口显示图片
1
2
3
4
5
6
7
8
9
| cv2.namedWindow("Image",0);
cv2.resizeWindow("Image", 800, 500);
cv2.imshow("Image", image)
while True:
c = cv2.waitKey(1)
if c == 27:
cv2.destroyAllWindows()
break
|
其中
1
2
| cv2.namedWindow("Image",0);
cv2.resizeWindow("Image", 800, 500);
|
这两行是设置窗口的大小,默认是图片的实际大小。
后面是让程序死循环,否则会直接推出,这时按Esc才会推出。
获取摄像头画面
1
2
3
4
5
6
7
8
9
10
11
12
13
14
15
| import cv2
video = cv2.VideoCapture(0)
fps = video.get(cv2.CAP_PROP_FPS)
print(fps)
size = (int(video.get(cv2.CAP_PROP_FRAME_WIDTH)), int(video.get(cv2.CAP_PROP_FRAME_HEIGHT)))
print(size)
while True:
ret, frame = video.read()
cv2.imshow("A video", frame)
c = cv2.waitKey(1)
if c == 27:
break
video.release()
cv2.destroyAllWindows()
|
摄像头添加人像识别
1
2
3
4
5
6
7
8
9
10
11
12
13
14
15
16
17
18
19
20
21
22
23
24
25
26
27
28
29
30
31
32
| import cv2
face_patterns = cv2.CascadeClassifier(r'.\xml\haarcascade_frontalface_alt2.xml')
video = cv2.VideoCapture(0)
fps = video.get(cv2.CAP_PROP_FPS)
print(fps)
size = (int(video.get(cv2.CAP_PROP_FRAME_WIDTH)), int(video.get(cv2.CAP_PROP_FRAME_HEIGHT)))
print(size)
timenum = 0
while True:
ret, frame = video.read()
if timenum >= 1:
timenum = 0
faces = face_patterns.detectMultiScale(frame, scaleFactor=1.1, minNeighbors=4, minSize=(60, 60))
for (x, y, w, h) in faces:
cv2.rectangle(frame, (x, y), (x + w, y + h), (0, 255, 0), 2)
cv2.imshow("Face", frame)
c = cv2.waitKey(int(1000 / fps))
timenum += 1
if c == 27:
break
video.release()
cv2.destroyAllWindows()
|