Webrtc介绍
前言
点对点的流程

多方通讯
WebRTC多方通信的架构
- Mesh方案 同一个房间支持4-6人
- MCU方案 适合多人视频会议,对服务器压力较大
- SFU方案 服务器只做转发不做音视频混流 适合1对多
流程
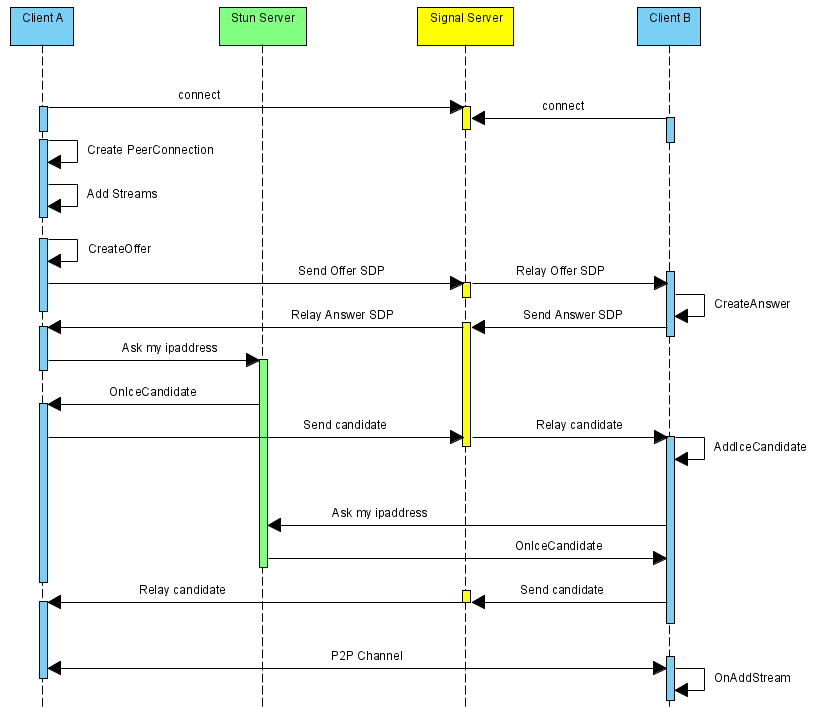
上述序列中,WebRTC并不提供Stun服务器和Signal服务器,服务器端需要自己实现。
Stun服务器可以用google提供的实现stun协议的测试服务器(stun:stun.l.google.com:19302),Signal服务器则完全需要自己实现了,它需要在ClientA和ClientB之间传送彼此的SDP信息和candidate信息,ClientA和ClientB通过这些信息建立P2P连接来传送音视频数据。
上述序列中,标注的场景是ClientA向ClientB发起对聊请求,调用描述如下:
ClientA首先创建PeerConnection对象,然后打开本地音视频设备,将音视频数据封装成MediaStream添加到PeerConnection中。
ClientA调用PeerConnection的CreateOffer方法创建一个用于offer的SDP对象,SDP对象中保存当前音视频的相关参数。
ClientA通过PeerConnection的SetLocalDescription方法将该SDP对象保存起来,并通过Signal服务器发送给ClientB。
ClientB接收到ClientA发送过的offer SDP对象,通过PeerConnection的SetRemoteDescription方法将其保存起来,并调用PeerConnection的CreateAnswer方法创建一个应答的SDP对象,通过PeerConnection的SetLocalDescription的方法保存该应答SDP对象并将它通过Signal服务器发送给ClientA。
ClientA接收到ClientB发送过来的应答SDP对象,将其通过PeerConnection的SetRemoteDescription方法保存起来。
在SDP信息的offer/answer流程中,ClientA和ClientB已经根据SDP信息创建好相应的音频Channel和视频Channel并开启Candidate数据的收集,Candidate数据可以简单地理解成Client端的IP地址信息(本地IP地址、公网IP地址、转发服务端分配的地址)。
当ClientA收集到Candidate信息后,PeerConnection会通过OnIceCandidate接口给ClientA发送通知,ClientA将收到的Candidate信息通过Signal服务器发送给ClientB,ClientB通过PeerConnection的AddIceCandidate方法保存起来。同样的操作ClientB对ClientA再来一次。
这样ClientA和ClientB就已经建立了音视频传输的P2P通道,ClientB接收到ClientA传送过来的音视频流,会通过PeerConnection的OnAddStream回调接口返回一个标识ClientA端音视频流的MediaStream对象,在ClientB端渲染出来即可。同样操作也适应ClientB到ClientA的音视频流的传输。
stun/turn服务器
STUN服务器

服务端
coturn是一个stun和turn服务端
1 | npm install coturn |
找到配置文件
1 | find /usr -name turnserver.conf |
我这的路径为
/usr/share/doc/coturn/etc/turnserver.conf
生成证书
1 | openssl req -x509 -newkey rsa:2048 -keyout /usr/local/etc/turn_server_pkey.pem -out /usr/local/etc/turn_server_cert.pem -days 99999 -nodes |
在配置文件末尾加入一下内容
1 | # 监听的端口 |
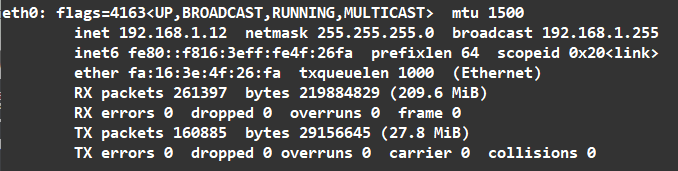
内网地址可以通过
1 | ifconfig |
找到eth0对应的IP
指定配置文件启动服务
1 | killall -9 turnserver |
我们进入这个地址测试
https://webrtc.github.io/samples/src/content/peerconnection/trickle-ice/
测试stun的时候不需要输入账号密码,只需要输入第一行,以stun:开头
stun:49.4.27.42:3478
需要输入turn地址,以turn:开头,以及账号密码
turn:49.4.27.42:3478
psvmc
123456
如图

注意
只要出现Done即为成功,下面提示的fail不用在意。
客户端
https://www.npmjs.com/package/stun
1 | npm i stun |
测试
使用谷歌的stun服务器
1 | const stun = require('stun'); |
可以用这个网址去测试stun和turn的有效性:
https://webrtc.github.io/samples/src/content/peerconnection/trickle-ice/