Python开发工具推荐及环境配置及项目创建
Python下载
https://www.python.org/downloads/release/python-371/
设置镜像
Windows下,直接在User目录中创建一个pip目录,再新建文件pip.ini。(例如:C:\Users\Administrator\pip\pip.ini)内容同上。
内容如下:
1 | [global] |
开发工具
- PyCharm
- VSCode
- Visual Studio
VSCode
这三个软件中只有VSCode是免费的,这里就用VSCode做为开发环境进行配置。
推荐插件
- PyFormat
虚拟环境
注意
我们开发的时候一定要创建一个虚拟环境,否则所有的项目的依赖都放在同一个环境下,会导致打包特别大或者是安装依赖失败。
安装pipenv
1 | pip install pipenv |
初始化
项目根目录运行
1 | pipenv install |
添加依赖
1 | pipenv install requests |
或者指定版本
1 | pipenv install requests==2.13.0 |
设置镜像
1 | pipenv install --pypi-mirror https://pypi.tuna.tsinghua.edu.cn/simple requests |
如果想对项目全局(per-project)设置,可以修改 Pipfile 中 [[source]] 小节:
1 | [[source]] |
另外一种方式是使用环境变量 PIPENV_PYPI_MIRROR 设置(Windows 系统使用 set 命令):
1 | export PIPENV_PYPI_MIRROR=https://pypi.tuna.tsinghua.edu.cn/simple |
卸载依赖
1 | pipenv uninstall requests |
卸载所有的包
这个会同时卸载所有项目依赖和开发依赖,但是配置文件中不会删除相应配置。
1 | pipenv uninstall --all |
卸载所有的开发包
这个会卸载所有开发依赖,但是配置文件中不会删除相应配置。
1 | pipenv uninstall --all-dev |
安装依赖
安装所有配置文件中的依赖
1 | pipenv install |
更新
查看所有需要更新的包:
1 | pipenv update --outdated |
更新所有包:
1 | pipenv update |
更新指定的包:
1 | pipenv update <包名> |
运行命令
用下面的命令可以启动一个在虚拟环境中的shell:
1 | pipenv shell |
如果不想启动shell,而是直接在虚拟环境中执行命令,可以使用run:
1 | pipenv run python --version |
查看虚拟环境的所有包
进入虚拟空间后使用
1 | pipenv shell |
依赖导出导入
项目下运行一下命令导出依赖
1 | pip freeze > requirements.txt |
在待部署机器上,使用以下命令安装就可以恢复依赖环境:
1 | pip install -r requirements.txt |
创建项目
创建文件夹
假如项目名称叫paper-split-py
创建文件夹paper-split-py,并进入
虚拟环境
在项目下添加文件.env
1 | PIPENV_VENV_IN_PROJECT=1 |
当系统环境变量和.env文件同时存在某个配置的时候,pipenv 会优先使用.env里的值。
初始化
项目根目录运行
1 | pipenv install |
这样会在项目中创建一个名为Pipfile的文件,文件内容类似下面这样:
1 | [[source]] |
其中
[packages]是项目依赖,也就是项目运行所需要的依赖。[dev-packages]是开发依赖,是我们项目运行时不需要但是开发过程中需要的依赖。
如果想修改Python版本
先删除项目下的.venv文件夹
修改配置
1 | [requires] |
重新安装依赖
1 | pipenv lock --clear |
镜像源
华为云
1 | [[source]] |
清华大学
1 | [[source]] |
添加依赖
1 | pipenv install requests |
或者指定版本
1 | pipenv install requests==2.13.0 |
清除旧的源缓存
如果安装不成功,可以清一下源再安装
1 | pipenv lock --clear |
设置虚拟环境
VSCode中设置
Ctrl+Shift+P 点击 Python:选择解释器,选择我们虚拟环境中的python.exe即可。

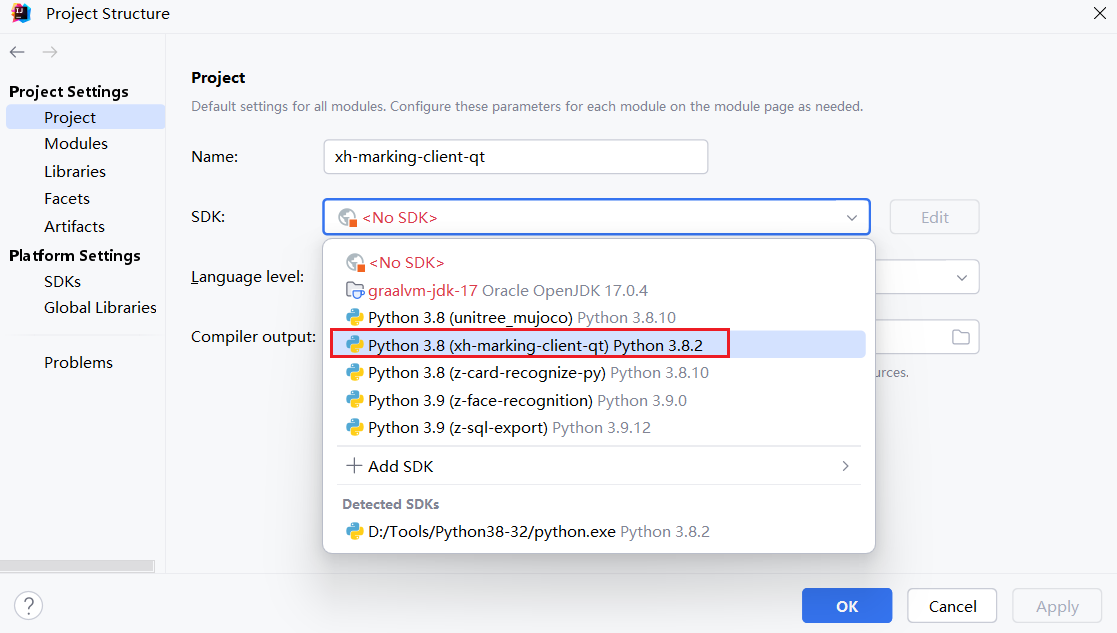
IDEA中设置
IDEA中目前没有免费支持QML的插件。
项目右键 => Open Module Settings => Project Settings => Project
SDK选择项目的虚拟环境或者添加新的Python SDK
报错
.venv\Scripts\Activate.ps1,因为在此系统上禁止运行脚本。
需要设置允许运行脚本。
打开 PowerShell(以管理员身份运行)。
1 | Set-ExecutionPolicy RemoteSigned |