创建项目
1
2
3
4
5
6
7
8
9
| git clone https://gitee.com/psvmc/electron-quick-start.git
ren electron-quick-start electron-flash-demo
cd electron-flash-demo
rmdir /s/q .git
rmdir /s/q .github
npm install
npm start
|
下载 32 位的 Electron
项目根目录中添加.npmrc
1
2
| arch=ia32
registry=https://registry.npm.taobao.org
|
设置 Flash 插件
下载插件
下载 pepflashplayer 插件
注意
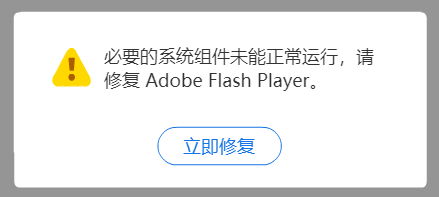
这个插件一定要用老版本,新版本的 flash 由于中国代理商要赚钱,会检测一个服务是否启动,不启动就会报错,强行让更新新版本。
如图
老版本的 Chrome 下载 里面带有 pepflashplayer 插件
https://www.slimjet.com/chrome/google-chrome-old-version.php
这里推荐下载 32 位的最老的版本
这个插件已经很难下载到了,我的方法是下载个 360 浏览器带极速内核的版本,打开一个带有 flash 的网页,它就会自动下载插件
在浏览器的安装目录下搜索pepflashplayer,就会找到对应的 dll 文件。
或者下载下面的 DLL
pepflashplayer32_20_0_0_286.dll
链接:https://pan.baidu.com/s/1_eMRkJ8m6jILi40BHSH-4Q
提取码:psvm
注意
这个插件是 32 位的,一定要保证 Electron 是 32 位的。
配置插件
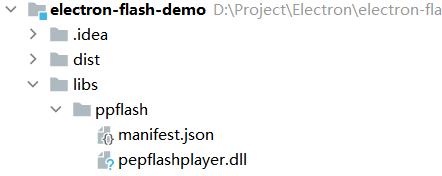
把下载的插件放在项目根目录下libs文件夹下,如图所示:
main.js 中添加以下代码
1
2
3
4
5
6
7
8
9
10
11
12
13
14
15
16
17
18
19
20
21
22
23
24
| let pluginName;
switch (process.platform) {
case "win32":
pluginName = "pepflashplayer.dll";
break;
case "darwin":
pluginName = "PepperFlashPlayer.plugin";
break;
case "linux":
pluginName = "libpepflashplayer.so";
break;
}
let plugins_path = path.join(__dirname, "libs", "ppflash", pluginName);
if (__dirname.includes(".asar")) {
plugins_path = path.join(
process.resourcesPath,
"libs",
"ppflash",
pluginName
);
}
app.commandLine.appendSwitch("ppapi-flash-path", plugins_path);
|
注意:
这里一定要进行判断,因为打包前后的路径是不一致的。
不显示菜单栏
1
2
3
4
5
| const electron = require("electron");
const Menu = electron.Menu;
Menu.setApplicationMenu(null);
|
页面配置
官方文档:
可用于测试 Flash 的页面:https://sc.chinaz.com/donghua/220315391630.htm
方式 1
这种方式最为简单。
主进程 BrowserWindow
BrowserWindow 添加 webPreferences 配置
1
2
3
4
5
6
7
8
9
10
| const mainWindow = new BrowserWindow({
width: 1366,
height: 768,
webPreferences: {
webviewTag: true,
javascript: true,
plugins: true,
webSecurity: false
}
});
|
plugins: true 这个配置项是必须的。
如果使用的是webview,在标签里添加 plugins 属性。
1
2
3
4
5
6
7
8
9
10
11
12
13
14
15
16
17
18
19
20
21
22
23
24
25
26
27
28
| <!DOCTYPE html>
<html>
<head>
<meta charset="UTF-8" />
<title>Flash</title>
</head>
<body>
<webview
src="https://sc.chinaz.com/donghua/220315391630.htm"
allowpopups
plugins
></webview>
<style lang="text/css">
body {
margin: 0;
padding: 0;
}
webview {
display: flex;
width: 100vw;
height: 100vh;
}
</style>
</body>
</html>
|
请注意,webview 标签的样式使用 display:flex; 来确保 iframe在传统和 flex 布局一起使用的情况下填充其 webview 容器的全部高度和宽度。
在 devtools 的控制台输入以下命令检查 Pepper Flash 插件是否被加载。
注意
这个只能判断是否加载插件,不能判断插件是否可用,比如没有 dll 就不可用,但是插件列表中已经存在。
方式 2
这种方式能控制访问的连接。
首先我们看四种打开新页面的方式
1
2
| <a href="https://www.psvmc.cn" target="_blank">_blank</a>
<span onclick="javascript:window.open('https://www.psvmc.cn')">open</span>
|
分别是:
_blank.open
实际运行情况是:
在正常的浏览器中,这两种情况都是能新开窗口的。但是,部分浏览器里面可能会拦截.open这种方式。但是绝对没有任何浏览器会拦截_blank这种。
在electron的webview中,
所以添加allowpopups 属性,就可以解决面的情况,
_blank的页面添加allowpopups后也无法打开
为了保证两种方式都能正常打开,页面中添加 JS,注意
这时候不要添加allowpopups,否则会打开两个页面。
因为new-window能同时监听到这两种方式。
示例
1
2
3
4
5
6
7
8
9
10
11
12
13
14
15
16
17
18
19
20
21
22
23
24
25
26
27
28
29
| <webview src="https://sc.chinaz.com/donghua/220315391630.htm" plugins></webview>
<script>
onload = () => {
const webview = document.querySelector('webview')
const new_window = (e) => {
const protocol = (new URL(e.url)).protocol;
if (protocol === 'http:' || protocol === 'https:') {
if(e.url.indexOf("sc.chinaz.com")!==-1){
window.open(e.url)
}
}
}
const will_navigate = (e) => {
const protocol = (new URL(e.url)).protocol;
if (protocol === 'http:' || protocol === 'https:') {
console.info("will_navigate",e.url);
if(e.url.indexOf("sc.chinaz.com")===-1){
webview.reload();
}
}
}
webview.addEventListener('new-window', new_window);
webview.addEventListener('will-navigate', will_navigate);
}
</script>
|
注意
new-window只能监听到页面内_blank和.open,页面的重定向是监听不到的。
方式 3
这种方式不但能够控制访问的连接,还能设置窗口属性。
默认的方式其实也是新的进程,和下面的方式一样,但是这种方式我们可以做一些窗口属性的设置。
渲染进程
1
2
3
4
5
6
7
8
9
10
11
12
13
14
15
16
17
18
19
20
21
22
23
24
25
| <script>
const ipcRenderer = window.require("electron").ipcRenderer;
onload = () => {
const webview = document.querySelector("webview");
const loadstart = () => {
console.log("开始加载");
};
const loadstop = () => {
console.log("加载完成");
};
const new_window = (e) => {
const protocol = new URL(e.url).protocol;
if (protocol === "http:" || protocol === "https:") {
ipcRenderer.send("open_url", e.url);
}
};
webview.addEventListener("did-start-loading", loadstart);
webview.addEventListener("did-stop-loading", loadstop);
webview.addEventListener("new-window", new_window);
};
</script>
|
主进程
1
2
3
4
5
6
7
8
9
10
11
12
13
14
15
16
17
18
19
20
21
22
23
24
25
26
27
28
29
30
31
32
33
34
35
36
37
38
39
40
41
42
43
44
45
| let mainWindow;
function createWindow() {
mainWindow = new BrowserWindow({
width: 1366,
height: 768,
webPreferences: {
webviewTag: true,
javascript: true,
plugins: true,
webSecurity: false,
nodeIntegration: true,
enableRemoteModule: true,
contextIsolation: false
}
});
mainWindow.loadFile("index.html");
}
const ipcMain = require("electron").ipcMain;
let new_win;
ipcMain.on("open_url", (event, arg) => {
new_win = new BrowserWindow({
width: 1366,
height: 768,
title: "",
webPreferences: {
webviewTag: true,
javascript: true,
plugins: true,
webSecurity: false
},
frame: true,
parent: mainWindow
});
new_win.loadURL(arg);
new_win.on("closed", () => {
new_win = null;
});
});
|
注意
主窗口要设置 Node 环境nodeIntegration: true,
禁止外链跳转
方式 1
按照逻辑我们要限制跳转,只要监听will-navigate事件,阻止它e.preventDefault();就行了,但是实际上这并没有用。
如下(这样写并不生效)
1
2
3
4
5
6
7
8
9
10
11
| const will_navigate = (e) => {
const protocol = new URL(e.url).protocol;
if (protocol === "http:" || protocol === "https:") {
console.info("will_navigate", e.url);
if (e.url.indexOf("sc.chinaz.com") === -1) {
e.preventDefault();
}
}
};
webview.addEventListener("will-navigate", will_navigate);
|
原因是
所有的 event.preventDefault() 都应该从主进程中呼叫而不是渲染进程。
所以我们就要在主进程中做如下操作
- 最外层
BrowserWindow 的 webContents 上监听 did-attach-webview 事件,获取新挂上去的 <webview> 的 webContents 。
- 使用获取到的
webContents 监听 will-navigate事件。
这时候,我们就可以在 will-navigate 事件中使用 e.preventDefault() 阻止 <webview> 导航至其他网页了
代码如下:
1
2
3
4
5
6
7
8
9
10
11
| mainWindow.webContents.on("did-attach-webview", (e, wc) => {
const will_navigate = (e, url) => {
console.info(url);
if (url.indexOf("sc.chinaz.com") === -1) {
e.preventDefault();
wc.reload();
}
};
wc.on("will-navigate", will_navigate);
});
|
方式 2
当然换个思路,虽然我们阻止不了,我们直接重新加载不就行了吗。
1
2
3
4
5
6
7
8
9
10
11
12
13
14
15
16
17
18
19
20
21
22
23
24
25
26
| onload = () => {
const webview = document.querySelector("webview");
const new_window = (e) => {
const protocol = new URL(e.url).protocol;
if (protocol === "http:" || protocol === "https:") {
if (e.url.indexOf("10.88.8.90:9080") !== -1) {
window.open(e.url);
}
}
};
const will_navigate = (e) => {
const protocol = new URL(e.url).protocol;
if (protocol === "http:" || protocol === "https:") {
console.info("will_navigate", e.url);
if (e.url.indexOf("10.88.8.90:9080") === -1) {
webview.reload();
}
}
};
webview.addEventListener("new-window", new_window);
webview.addEventListener("will-navigate", will_navigate);
};
|
我的方案
下面的两种方案 我最终的选择是
上面页面配置的方式 3 和禁止跳转的方式 1 相结合,这样就可以同时处理主页面和子页面的跳转限制。
主进程
1
2
3
4
5
6
7
8
9
10
11
12
13
14
15
16
17
18
19
20
21
22
23
24
25
26
27
28
29
30
31
32
33
34
35
36
37
38
39
40
41
42
43
44
45
46
47
48
49
50
51
52
53
54
55
56
57
58
59
60
61
62
63
64
65
66
67
68
69
| let mainWindow;
function createWindow() {
mainWindow = new BrowserWindow({
width: 1366,
height: 768,
webPreferences: {
webviewTag: true,
javascript: true,
plugins: true,
webSecurity: false,
nodeIntegration: true,
enableRemoteModule: true,
contextIsolation: false
}
});
mainWindow.loadFile("index.html");
addListener(mainWindow);
}
const ipcMain = require("electron").ipcMain;
let new_win;
ipcMain.on("open_url", (event, arg) => {
new_win = new BrowserWindow({
width: 1366,
height: 768,
title: "",
webPreferences: {
webviewTag: true,
javascript: true,
plugins: true,
webSecurity: false
},
frame: true,
parent: mainWindow
});
new_win.loadURL(arg);
new_win.on("closed", () => {
new_win = null;
});
addListener(new_win);
});
function addListener(win) {
win.webContents.on("did-attach-webview", (e, wc) => {
const will_navigate = (e, url) => {
if (url.indexOf("10.88.8.90:9080") === -1) {
e.preventDefault();
wc.reload();
}
};
wc.on("will-navigate", will_navigate);
});
const will_navigate = (e, url) => {
if (url.indexOf("10.88.8.90:9080") === -1) {
e.preventDefault();
win.webContents.reload();
}
};
win.webContents.on("will-navigate", will_navigate);
}
|
渲染进程
1
2
3
4
5
6
7
8
9
10
11
12
13
14
15
16
17
18
19
20
21
22
23
24
25
26
27
28
| <webview
src="http://10.88.8.90:9080/AtomLocal/common/login.faces"
disablewebsecurity
plugins
></webview>
<script>
const ipcRenderer = window.require("electron").ipcRenderer;
onload = () => {
const webview = document.querySelector("webview");
let lastUrl = "";
const new_window = (e) => {
if (!lastUrl) {
const protocol = new URL(e.url).protocol;
if (protocol === "http:" || protocol === "https:") {
if (e.url.indexOf("10.88.8.90:9080") !== -1) {
ipcRenderer.send("open_url", e.url);
lastUrl = e.url;
setTimeout(() => {
lastUrl = "";
}, 1000);
}
}
}
};
webview.addEventListener("new-window", new_window);
};
</script>
|
打包
添加依赖
1
| npm install electron-builder@22.9.1 --save-dev
|
在 pakage.json 中,我们 build 的配置下面内容:
1
2
3
4
5
6
7
8
9
10
11
12
13
14
15
16
17
18
19
20
21
22
23
24
25
26
27
28
29
30
31
32
33
34
35
36
37
38
39
40
41
42
| {
"name": "flashapp",
"version": "1.0.0",
"description": "",
"main": "main.js",
"scripts": {
"start": "electron .",
"dist": "electron-builder --win --ia32",
"dist_dir": "electron-builder --win --ia32 --dir"
},
"build": {
"appId": "cn.psvmc.flashapp",
"productName": "Flash加载",
"icon": "app.ico",
"asar": true,
"files": ["main.js", "*.html", "app.ico", "node_modules/**/*"],
"mac": {
"icon": "app.ico",
"target": ["dmg", "zip"]
},
"win": {
"icon": "app.ico",
"target": ["zip"],
"extraResources": "./libs/**/*"
},
"nsis": {
"oneClick": false,
"allowElevation": true,
"allowToChangeInstallationDirectory": true,
"installerIcon": "app.ico",
"uninstallerIcon": "app.ico",
"installerHeaderIcon": "app.ico",
"createDesktopShortcut": true,
"createStartMenuShortcut": true,
"license": "LICENSE.txt"
}
},
"devDependencies": {
"electron": "^11.1.1",
"electron-builder": "22.9.1"
}
}
|
其中最重要的配置就是 "extraResources": "./libs/**/*" 这样的话我们的所有配置就算完成了。
注意 NodeJS 的版本要在 14 以上
依赖版本号
1
2
3
| "electron-builder": "22.9.1"
"electron-builder": "~22.9.1"
"electron-builder": "^22.9.1"
|
其中
- 前面不带符号则版本号的 3 个数字都匹配
~则版本号的前 2 个数字匹配^则版本号的第一个数字匹配
建议
使用~+版本号