QT Quick-启程

前言

QT文档:https://runebook.dev/zh-CN/docs/qt/

QT QuickQt widgets这两种技术,官方是强推QT Quick的。

定位

QT Quick中布局一般有如下四种方式,

  1. 绝对坐标:x、y、z、width、height、top、left
  2. 锚(anchors) 布局
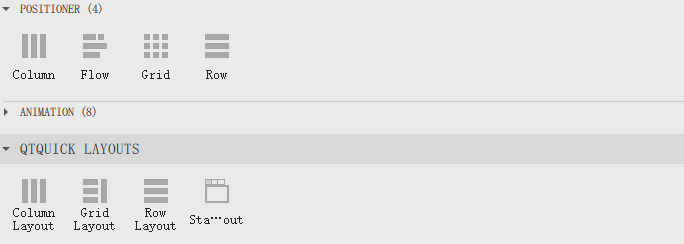
  3. 定位器(Row、Column、Grid、Flow)
  4. 布局管理器(RowLayout、ColumnLayout、GridLayout、StackLayout)

绝对布局很好理解,给值就显示,但是不灵活;

anchors 实际上是 Item 的一个属性集

Row 则是一个单独的 Item ,专门用来管理其它 Item 的,后面介绍的几种布局,也是类似的。

锚(anchors) 布局的参数:

1
2
3
4
5
6
7
8
9
10
11
12
13
14
15
16
17
18
19
20
21
22
23
24
25
26
27
//左上右下对齐
anchors.left : AnchorLine
anchors.top : AnchorLine
anchors.right : AnchorLine
anchors.bottom : AnchorLine

//Margin
anchors.leftMargin : real
anchors.topMargin : real
anchors.rightMargin : real
anchors.bottomMargin : real
anchors.margins : real

//基线对齐及偏移
anchors.baseline : AnchorLine
anchors.baselineOffset : real


anchors.mirrored : bool
anchors.fill : Item

//居中与偏移
anchors.centerIn : Item
anchors.horizontalCenter : AnchorLine
anchors.verticalCenter : AnchorLine
anchors.horizontalCenterOffset : real
anchors.verticalCenterOffset : real

其中

  • real 具体的数值
  • Item是组建的ID或者parent
  • bool是true或false
  • AnchorLine 示例anchors.horizontalCenter: parent.horizontalCenter

注意

不要在Row或RowLayout相关的组件中使用anchors,会导致组件本身的特性不生效。

窗口设置

窗口的属性

1
2
3
4
5
6
7
8
9
10
11
12
13
14
15
16
17
Window {
title: qsTr("一个普通标题窗口") //窗口标题
width: 640 //宽度
height: 480 //高度
visible: true //是否可见,缺省为true
color: "#ffffff" //窗口背景色
//#00000000 为窗口透明
//QML支持black 等颜色样式(没有#)
//QML支持#11cfff 等颜色样式
//QML同样支持RGB格式
flags: Qt.Window //窗口标志 说明是什么窗口 使用 | 分割,缺省为Qt.Window
//Qt.Window 普通窗口模式,带标题栏
//Qt.FramelessWindowHint 隐藏标题栏窗口
opacity: 1 //透明度 数值区间为0~1 支持小数,缺省为1
x:0 //位于父窗体的x位置,以左上角为起点,缺省为0 (此时window的父窗体就是桌面了)
y:0 //位于父窗体的y位置,以左上角为起点,缺省为0 (此时window的父窗体就是桌面了)
}

无边框

1
2
3
4
5
6
7
8
Window {
width: 640
height: 480
visible: true
color: "#fefefe"
title: qsTr("主页面")
flags: Qt.FramelessWindowHint
}

显示标题栏,但是没有关闭最大最小化按钮

1
2
3
4
5
6
7
8
Window {
width: 640
height: 480
visible: true
color: "#fefefe"
title: qsTr("主页面")
flags: "CustomizeWindowHint"
}

背景透明无边框窗口

1
2
3
4
5
6
7
8
9
Window {
width: 640
height: 480
visible: true
color: "#00000000"
title: qsTr("主页面")
flags: Qt.FramelessWindowHint|Qt.Window|Qt.WindowStaysOnTopHint
opacity:1
}

opacity这个属性是对当前组件以及子组件都设置不透明度,所以不太适用

color: Qt.rgba(0,0,0,0)是对当前设置透明度,不会影响子组件

注意

  • Qt.FramelessWindowHint 无边框
  • Qt.Window 显示在状态栏
  • Qt.WindowStaysOnTopHint 窗口置顶

窗口穿透

局部穿透

https://doc.qt.io/qt-5/qwindow.html#setMask

官网是这么说的

The mask is a hint to the windowing system that the application does not want to receive mouse or touch input outside the given region.

意思是

应用不接收给定的区域之外的事件。

工具类

1
2
3
4
5
6
7
8
9
10
11
12
13
14
15
16
17
18
19
20
21
22
23
24
from PySide2 import QtCore
from PySide2.QtCore import Slot, QPoint
from PySide2.QtGui import QPolygon, QRegion, QWindow


class ZMaskUtil(QtCore.QObject):
points = []

@Slot()
def clearPoints(self):
self.points.clear()

@Slot(QPoint)
def addPoint(self, point):
self.points.append(point)

@Slot(QWindow)
def setMask(self, window):
if window:
polygon = QPolygon(self.points)
region = QRegion(polygon)
# fillscreen = window.screen().geometry()
# region = region.xored(fillscreen)
window.setMask(region)

布局

1
2
3
4
5
6
7
8
9
10
11
12
13
14
15
16
17
18
19
20
21
22
23
24
25
26
27
28
29
30
31
32
33
34
35
import QtQuick 2.14
import QtQuick.Controls 2.14
import QtQuick.Window 2.14

Window {
id:mywin
visible: true
width: 600; height: 400
color: "#33000000"
title: qsTr("主页面")
flags: Qt.FramelessWindowHint|Qt.Window|Qt.WindowStaysOnTopHint

function renderMask(){
maskutil.clearPoints();
maskutil.addPoint(Qt.point(0,0));
maskutil.addPoint(Qt.point(100,0));
maskutil.addPoint(Qt.point(100,100));
maskutil.addPoint(Qt.point(0,100));
maskutil.addPoint(Qt.point(0,0));
maskutil.setMask(mywin)
}

Component.onCompleted: {
renderMask()
}

Button {
text: "hello"
width: 100
height: 100
onClicked: {

}
}
}

程序入口

1
2
3
4
5
6
7
8
9
10
11
12
13
14
15
import sys

from PySide2.QtCore import *
from PySide2.QtQml import QQmlApplicationEngine
from PySide2.QtWidgets import QApplication

from ZMaskUtil import ZMaskUtil

if __name__ == '__main__':
app = QApplication()
engine = QQmlApplicationEngine()
maskutil = ZMaskUtil()
engine.rootContext().setContextProperty('maskutil', maskutil)
engine.load(QUrl.fromLocalFile('./main.qml'))
sys.exit(app.exec_())

注意

这样其实窗口背景不是透明的也没关系,因为这个方法相当于把穿透的地方都裁剪掉了。

注意上面的例子中传入的坐标区域是不穿透的,

如果想要传入的地方穿透

1
2
3
>fillscreen = window.screen().geometry()
> region = region.xored(fillscreen)
>

把选择的区域反向就行了。

整体穿透

如果整体穿透直接用flags属性设置就行了

1
2
3
4
5
6
7
8
Window {
id:mywin
visible: true
width: 600; height: 400
color: "#33000000"
title: qsTr("主页面")
flags: Qt.WindowTransparentForInput | Qt.FramelessWindowHint|Qt.Window|Qt.WindowStaysOnTopHint
}

主要是这个属性Qt.WindowTransparentForInput

窗口拖动/菜单/托盘

1
2
3
4
5
6
7
8
9
10
11
12
13
14
15
16
17
18
19
20
21
22
23
24
25
26
27
28
29
30
31
32
33
34
35
36
37
38
39
40
41
42
43
44
45
46
47
48
49
50
51
52
53
54
55
56
57
58
59
60
61
62
63
64
65
66
67
68
69
70
71
72
73
74
75
76
77
78
79
80
81
82
83
84
85
86
87
88
89
90
91
92
93
94
95
96
97
98
99
100
101
102
103
104
105
106
107
108
109
110
111
112
113
114
115
116
117
118
119
120
121
122
123
import QtQuick 2.9
import QtQuick.Window 2.2
import QtQuick.Controls 1.4 as Controls
import Qt.labs.platform 1.0


//包含系统托盘的导包
Window {
id: mainWindow
visible: true
x:Screen.desktopAvailableWidth -width
y:Screen.desktopAvailableHeight - height
width: 200
height: 60
title: qsTr("tiny monitor")
//无边框的window flags
flags: Qt.FramelessWindowHint
| Qt.WindowSystemMenuHint
| Qt.WindowStaysOnTopHint
| Qt.X11BypassWindowManagerHint
//灰色0.9透明度
color: Qt.rgba(0.5, 0.5, 0.5, 0.9)

//鼠标可控制区域
MouseArea {
property point clickPos: "0,0"
anchors.fill: parent
onPressed: {
mainWindow.requestActivate()
clickPos = Qt.point(mouseX, mouseY)
}

onPositionChanged: {
//鼠标偏移量
var delta = Qt.point(mouse.x - clickPos.x, mouse.y - clickPos.y)
var tempx = mainWindow.x + delta.x;
var tempy = mainWindow.y + delta.y

if(tempx<0){
tempx = 0;
}

if(tempx>Screen.desktopAvailableWidth -mainWindow.width){
tempx = Screen.desktopAvailableWidth -mainWindow.width;
}

if(tempy<0){
tempy = 0;
}

if(tempy>Screen.desktopAvailableHeight -mainWindow.height){
tempy = Screen.desktopAvailableHeight -mainWindow.height;
}

mainWindow.x = tempx
mainWindow.y = tempy
}
//添加右键菜单
acceptedButtons: Qt.LeftButton | Qt.RightButton // 激活右键(别落下这个)
onClicked: {
if (mouse.button === Qt.RightButton) {
// 右键菜单
contentMenu.popup()
}
}
}
//不是托盘的菜单类
Controls.Menu {
id: contentMenu
// 右键菜单
Controls.MenuItem {
id:hideItem
text: qsTr("隐藏")
onTriggered: {
if(trayIcon==null){
console.log("系统托盘不存在");
contentMenu.removeItem(hideItem);
return;
}else{
if(trayIcon.available){
console.log("系统托盘存在");
}else{
console.log("系统托盘不存在");
contentMenu.removeItem(hideItem)
}
}
mainWindow.hide()
}
}
Controls.MenuItem {
text: qsTr("退出")
onTriggered: Qt.quit()
}
}

//使用系统托盘的菜单组件
Menu {
id: systemTrayMenu
// 右键菜单
MenuItem {
text: qsTr("隐藏")
shortcut: "Ctrl+z"
onTriggered: mainWindow.hide()
}
MenuItem {
text: qsTr("退出")
onTriggered: Qt.quit()
}
}
//系统托盘
SystemTrayIcon {
id:trayIcon
visible: true
iconSource: "qrc:/images/logo.png"
tooltip: "客户端"
onActivated: {
mainWindow.show()
mainWindow.raise()
mainWindow.requestActivate()
}
menu: systemTrayMenu
}
}

组件

基本组件

image-20211103002900919

这里面的这几个内部也可以填充其它组件

  • FocusScope
  • MouseArea
  • Rectangle

Text/TextInput/TextEdit

Text 只支持文本的显示。

TextInput 编辑一行文本。

TextEdit 提供的多行文本编辑框。

Image/AnimatedImage/BorderImage

Image用来展示静态图片

1
2
3
4
5
6
7
8
Image {
anchors.centerIn: parent
id: m_image
width: 60
mipmap:true
fillMode: Image.PreserveAspectFit
source: "qrc:/image/test2.jpg"
}

AnimatedImage展示动态图片

AnimatedImage 提供了五个属性:

  • currentFrame,指示当前正在播放的帧序号
  • frameCount,指示图片的总帧数
  • paused,表示是否暂停,设置它也可以暂停或继续播放
  • playing,指示动画是否在播放,默认为 true ,意思是 AnimatedImage 对象创建后立即开始播放
  • source,类型为 url ,指定要播放的图片地址,可以使本地文件、 qrc 里的资源、网络文件

示例

1
2
3
4
5
6
7
8
AnimatedImage {
id: animated;
source: "qrc:/shapes.gif";

onCurrentFrameChanged: {
info.text = "%1/%2".arg(animated.currentFrame).arg(animated.frameCount);
}
}

BorderImage 能设置圆角的组件

1
2
3
4
5
6
7
8
9
BorderImage {
id: scalableElement2
source: "./Images/baseBImage.png"
width: 100
height: 100
anchors.centerIn: parent
border.left: 10; border.top: 10
border.right: 10; border.bottom: 10
}

Rectangle

填充渐变色

1
2
3
4
5
6
7
8
9
10
11
12
Rectangle {
x: 160
y: 20
width: 100
height: 100
radius: 8
gradient: Gradient {
GradientStop { position: 0.0; color: "aqua" }
GradientStop { position: 1.0; color: "teal" }
}
border { width: 3; color: "white" }
}

Item

Item 类型比较特殊,因为它是所有其他可视化类型的基类型。

尽管一个 Item 对象本身没有一个可视化的外观,但是它定义了可视化项目中所有常见的特性,比如 x 、y 、width 、height 、anchors 和键盘处理等。Item 类型最常见的用法是作为其他项目的容器,这样就可以把其他项目作为一个整体.

1
2
3
4
5
6
7
8
9
10
11
12
13
14
15
16
17
18
Item {
Image {
source: "tile.png"
}
Image {
x: 80
width: 100
height: 100
source: "tile.png"
}
Image {
x: 190
width: 100
height: 100
fillMode: Image.Tile
source: "tile.png"
}
}

MouseArea

工具类组件,没有外观。

MouseArea的作用是监听点击方法。

1
2
3
4
5
6
7
8
MouseArea
{
anchors.fill: parent
onClicked:
{
Qt.quit()
}
}

MouseArea子对象是鼠标区域,是一个不可见的组件,通过MouseArea对象可以实现鼠标互动。将鼠标区域覆盖整个Rectangle窗口。

开启事件传递

MouseArea 有一个属性为 propagateComposedEvents,默认为 false,当设置为 true 时,就可以将事件传递给重叠的其他鼠标区域了(包括控件),见 Qt 官方文档:https://doc.qt.io/qt-5/qml-qtquick-mousearea.html#propagateComposedEvents-prop,示例代码如下:

1
2
3
4
5
6
7
8
MouseArea {
anchors.fill: parent
propagateComposedEvents: true
onClicked: {
console.log("clicked blue")
mouse.accepted = false
}
}

以上代码中开启了 propagateComposedEvents 属性,并且将 onClickedmouse.accepted 重置为 false 了,这样 onClicked 事件就会顺利的传递到下层控件中。如果你希望所有点击和释放操作都传递到下层,可以将 onPressed、onReleased 都重写掉,设置 accepted 为 false,如下示例:

1
2
3
4
5
6
7
8
9
10
11
12
13
MouseArea {
anchors.fill: parent
propagateComposedEvents: true
onClicked: {
mouse.accepted = false
}
onPressed: {
mouse.accepted = false
}
onReleased: {
mouse.accepted = false
}
}

这样实现后,这个 MouseArea 的所有点击、按下、释放操作都会传递到下层,而且如果你开启了 hoverEnabled 属性,还不影响 onPositionChanged(鼠标移动)的事件响应,完美的实现了一个鼠标区域只响应鼠标移动但又可以传递点击等事件到下层控件的需求。

FocusScope

FocusScope继承Item,是一个工具类组件,没有外观,一般都作为root组件出现。

QML中事件的传递顺序是 从外而内,从下而上 ,这个顺序是和qml内部组件实例化顺序一致的。

1
2
3
4
5
6
7
8
9
10
11
12
13
14
15
16
17
18
19
20
21
22
23
24
25
26
27
Rectangle{
//截断focus事件
Rectangle{
//由于外层截断了focus,所以永远无法获取focus事件
}

Rectangle{
//由于外层截断了focus,所以永远无法获取focus事件
}

}

FocusScope{
id:root
//永远不截断focus事件,会立刻传递给自己的children,从下向上找到第一个focus属性是true的child,把focus事件传给它
Rectangle{
id:rec2
focus:true
//因为rec1设置了focus = false,所以root会把focus事件传递给rec2,有因为focus=true,所以会截断并获取事件
}

Rectangle{
id:rec1
focus:false
//因为设置了focus = false,所以截断
}
}

Flipable

一个工具类组件,没有外观

Flipable 是一种可以在其正面和背面之间明显“翻转”的物品,就像卡片一样。它可以与RotationStateTransition类型一起使用以产生翻转效果。

frontback属性被用来容纳被分别显示在flipable项目的正面和背面上的项目。

1
2
3
4
5
6
7
8
9
10
11
12
13
14
15
16
17
18
19
20
21
22
23
24
25
26
27
28
29
30
31
32
33
Flipable {
id: flipable
width: 240
height: 240

property bool flipped: false

front: Image { source: "front.png"; anchors.centerIn: parent }
back: Image { source: "back.png"; anchors.centerIn: parent }

transform: Rotation {
id: rotation
origin.x: flipable.width/2
origin.y: flipable.height/2
axis.x: 0; axis.y: 1; axis.z: 0 // set axis.y to 1 to rotate around y-axis
angle: 0 // the default angle
}

states: State {
name: "back"
PropertyChanges { target: rotation; angle: 180 }
when: flipable.flipped
}

transitions: Transition {
NumberAnimation { target: rotation; property: "angle"; duration: 4000 }
}

MouseArea {
anchors.fill: parent
onClicked: flipable.flipped = !flipable.flipped
}
}

定位组件和布局管理器

image-20211103002943491

定位器(Row、Column、Grid、Flow)

布局管理器(RowLayout、ColumnLayout、GridLayout、StackLayout)

Layout

要使用layout布局的属性 需要引用

1
import QtQuick.Layouts 1.12

示例1

一个简单的示例

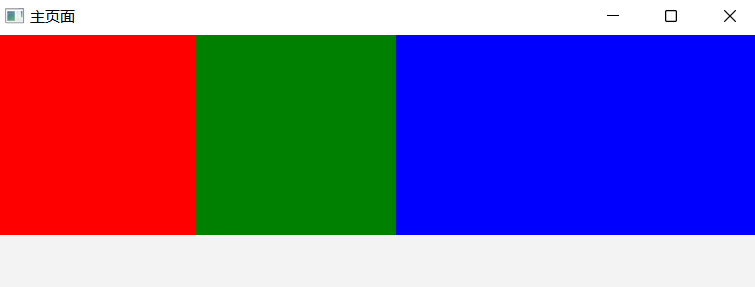
横向分布,最后一个填充剩余空间。

1
2
3
4
5
6
7
8
9
10
11
12
13
14
15
16
17
18
19
20
21
22
23
24
25
26
27
28
29
30
31
32
33
34
35
36
37
38
39
import QtQuick 2.14
import QtQuick.Window 2.14
import QtQuick.Layouts 1.12

Window {
width: 640
height: 480
visible: true
color: "#f3f3f3"
title: qsTr("主页面")

RowLayout {
id: row
height: 200
spacing: 0
anchors.left:parent.left
anchors.right:parent.right

Rectangle {
id: rectangle
width: 200
height: parent.height
color: "red"
}
Rectangle {
id: rectangle2
width: 200
height: parent.height
color: "green"
}
Rectangle {
id: rectangle3
height: parent.height
color: "blue"
Layout.fillWidth: true
}

}
}

显示效果

image-20211102233725218

其中

1
2
3
4
5
6
7
RowLayout {
id: row
height: 200
spacing: 0
anchors.left:parent.left
anchors.right:parent.right
}

1
2
3
4
5
6
RowLayout {
id: row
height: 200
width:parent.width
spacing: 0
}

是等效的,前者就用了锚(anchors) 布局

只有在Layout相关的控件中才能使用Layout.fillWidth: true相关的属性。

所以RowLayout可以实现元素填充剩余空间,而Row是不可以的,除非我们复制宽度是通过计算的值。

代码如下

1
2
3
4
5
6
7
8
9
10
11
12
13
14
15
16
17
18
19
20
21
22
23
24
25
26
27
28
29
30
31
32
33
34
35
36
37
38
39
import QtQuick 2.14
import QtQuick.Window 2.14
import QtQuick.Layouts 1.12

Window {
width: 640
height: 480
visible: true
color: "#f3f3f3"
title: qsTr("主页面")

Row {
id: row
height: 200
spacing: 0
anchors.left:parent.left
anchors.right:parent.right

Rectangle {
id: rectangle
width: 200
height: parent.height
color: "red"
}
Rectangle {
id: rectangle2
width: 200
height: parent.height
color: "green"
}
Rectangle {
id: rectangle3
height: parent.height
width: parent.width-rectangle.width-rectangle2.width
color: "blue"
}

}
}

示例2

基本的事件和按钮按压变色及点击事件

1
2
3
4
5
6
7
8
9
10
11
12
13
14
15
16
17
18
19
20
21
22
23
24
25
26
27
28
29
30
31
32
33
34
35
36
37
38
39
40
41
42
43
44
45
46
import QtQuick 2.14
import QtQuick.Window 2.14
import QtQuick.Layouts 1.12

Window {
width: 640
height: 480
visible: true
color: "#f3f3f3"
title: qsTr("主页面")

MouseArea {
width: 200
height: 200
anchors.centerIn: parent
Rectangle {
id:myrect
anchors.fill: parent
color: "blue"

Text {
text: "点击"
color: "white"
font.pixelSize: 16
anchors.centerIn: parent
}
}
onClicked: {
console.log("区域点击")
}

onPressedChanged: {
if(pressed){
myrect.color="green"
}else{
myrect.color="blue"
}
console.log(pressed)
}
}

Component.onCompleted: {
console.log("加载完毕")
}

}

Rectangle的事件

1
2
3
4
5
6
7
8
9
10
11
12
13
14
15
16
17
Rectangle {
width: 600
height: 400
anchors.centerIn: parent
color: "lightgray"
TapHandler {
//点击屏幕时,修改了pressed属性,触发onPressedChanged
onPressedChanged: {
console.log("press ? : ", pressed)
}

//长按时触发onLongPressed
onLongPressed: {
console.log("long pressed")
}
}
}

QML 信号与槽

方式1

对于 QML 中的属性如果其值发生改变, QML 自动会发生相关信号

on<Property>Changed 这种格式

举例:

1
2
3
MouseArea {
onPressedChanged: console.log("value:" , pressed)
}

方式2

比较适合在同一个 QML 文件内

1
2
3
signal <name> (type parameter, type parameter)

on<Name>

例如:

1
2
3
4
signal testSignal(real x, real b)
testSignal(x, b) //执行 也就是 发送信号 类似 quick 中的 emit signal()

onTestSignal: console.log("xxx")// 槽 用于接收信号

举例:

1
2
3
4
5
6
7
8
9
10
11
Item {
signal clickTest();

MouseArea {
onPressed: {
clickTest()
}
}

onClickTest: consloe.log("received")
}

方式3

适合一对多或者跨 QML
断开就使用 disconnect 就好
1 : 跟信号在同一个范围,可这么写

1
2
3
4
5
6
7
8
9
10
11
12
13
14
15
16
17
18
19
20
21
22
signal sendSignal();
MouseArea {
sendSignal()
}

Component.onCompleted: {
sendSignal.connect(send21)
sendSignal.connect(send22)
sendSignal.connect(send23)
}

function send21() {
console.log("1: received signal");
}

function send22() {
console.log("2: received signal");
}

function send23() {
console.log("3: received signal");
}

2:如果与信号不在同一范围

1
2
3
4
5
6
7
8
9
10
11
12
13
14
15
16
17
18
19
20
21
22
23
24
25
26
27
MyTest {
signal testT()
id : mytest
MouseArea {
onPressed: {
mytest.testT()
}
}
}

Component.onCompleted: {
mytest.testT.connect(send21) // mytest.testT.disconnect(send21)
mytest.testT.connect(send22)
mytest.testT.connect(send23)
}

function send21() {
console.log("1: received signal");
}

function send22() {
console.log("2: received signal");
}

function send23() {
console.log("3: received signal");
}

3:Connections 最主要的优势可以连接到没有定义在 QML 的东西
格式:

1
2
3
4
Connections {
target: 信号的来源
on<Signal>:
}

示例

1
2
3
4
5
6
Connections {
target: mytest
onTestT: {
send21();
}
}

QML中调用Python的函数

main.qml

1
2
3
4
5
6
7
8
9
10
11
12
13
14
15
16
import QtQuick 2.14
import QtQuick.Controls 2.14
import QtQuick.Window 2.14

Window {
width: 600; height: 400
visible: true
title: "主页面"

Button {
text: "打印"
onClicked: {
pageData.mlog("你好")
}
}
}

main.py

1
2
3
4
5
6
7
8
9
10
11
12
13
14
15
16
17
18
19
20
21
22
23
24
25
26
27
28
29
30
31
32
33
34
35
36
import os
from pathlib import Path
import sys

from PySide2.QtCore import *
from PySide2.QtGui import QGuiApplication
from PySide2.QtQml import QQmlApplicationEngine
from PySide2.QtWidgets import QApplication


# 1) 必须继承 QObject.
class MainWin(QObject):

# 2) 这里 Pycharm 会标记黄色警示, 忽略即可.
# 3) 第一个参数 self 不要丢了.
# noinspection PyCallingNonCallable
@Slot(str)
def mlog(self, s):
print(s)


if __name__ == '__main__':
app = QApplication()
engine = QQmlApplicationEngine()

# 4) 经测试, 必须先实例化 MainWin 赋给一个变量, 然后把变量传
pd = MainWin()

# 5) 如果我们没有赋给变量传进去, 而是直接实例化给第二个参数:
# engine.rootContext().setContextProperty('speaker', Speaker())
# 在 QML 中就会报错. 确实让人无法理解.
engine.rootContext().setContextProperty('pageData', pd)

# 6) 当把 Speaker 传入上下文后, 我们才可以 load 布局文件.
engine.load(QUrl.fromLocalFile('./main.qml'))
sys.exit(app.exec_())

Python 连接 QML 信号

(QML 发信号, Python 为槽)

main.qml

1
2
3
4
5
6
7
8
9
10
11
12
13
14
15
import QtQuick 2.14
import QtQuick.Controls 2.14
import QtQuick.Window 2.14

Window {
visible: true
width: 600; height: 400

signal mlog(string s)

Button {
text: "hello"
onClicked: mlog(text)
}
}

main.py

1
2
3
4
5
6
7
8
9
10
11
12
13
14
15
16
17
18
19
20
21
22
23
24
import sys

from PySide2.QtCore import *
from PySide2.QtQml import QQmlApplicationEngine
from PySide2.QtWidgets import QApplication


def log(s):
print(s)


if __name__ == '__main__':
app = QApplication()
engine = QQmlApplicationEngine()
engine.load(QUrl.fromLocalFile('./main.qml'))

# 获取 root 对象.
root = engine.rootObjects()[0] # type: QObject
# 找到目标对象. 由于我们的目标对象是 Window, 也就是 root 对象. 所以直接用.
target_view = root
# 绑定信号.
target_view.mlog.connect(log) # 前一个 mlog 是 qml 的信号, 后一个log是 Python 的

sys.exit(app.exec_())

Python获取控件

1
2
3
4
5
6
7
Text {
id: mytext
objectName: "mytext"
text: "Click Me"
font.pixelSize: 20
anchors.centerIn: parent
}

获取控件

1
txt_obj = engine.rootObjects()[0].findChild(QObject, "mytext")

获取控件属性的值:

1
txt_value = txt_obj.property("text")

设置控件属性的值:

1
txt_obj.setProperty("text", "Clicked!")