前言
之前说了使用JdbcTemplate、MyBatis、Spring Data JPA三种连接数据库的方式。
对于一些不常变更,或者是数据库数据太多,需要优化请求速度的,我们可以使用二级缓存解决。
二级缓存分两种
- 本地缓存 比如 Ehcache
- 远程缓存 比如 Redis
我们可以根据实际情况选择对应的缓存。
Ehcache
在使用 Spring Data JPA 进行数据访问时,可以使用二级缓存来提高程序的性能。
注意
这里使用的不是基于Hibernate 的Ehcache实现。
使用注意
二级缓存也存在一些潜在的问题,如缓存的数据可能不是最新的(缓存不一致)、缓存数据的内存占用等。
因此,在使用二级缓存时,需要根据具体的业务场景和需求来决定是否使用以及如何配置和管理缓存。
以下演示了如何在 Spring Boot 应用程序中配置 Ehcache 作为二级缓存。
添加依赖
在 pom.xml 文件中添加 Ehcache 依赖
1 | <dependency> |
添加Ehcache 配置
创建 Ehcache 配置文件 ehcache.xml
1 |
|
在上述示例代码中,创建了名为 userService.getUserByName 的缓存区域,设置了最大缓存数、缓存时间等属性。
参数解释
各个熟悉的含义
name 缓存空间名称(非缓存key)
maxElementsInMemory:设置了缓存的上限,最多存储多少个记录对象
maxElementsOnDisk:硬盘中最大缓存对象数,若是0表示无穷大
eternal:true表示对象永不过期,此时会忽略timeToIdleSeconds和timeToLiveSeconds属性,默认为false
overflowToDisk:true表示当内存缓存的对象数目达到了maxElementsInMemory界限后,会把溢出的对象写到硬盘缓存中。注意:如果缓存的对象要写入到硬盘中的话,则该对象必须实现了Serializable接口才行。
diskSpoolBufferSizeMB:磁盘缓存区大小,默认为30MB。每个Cache都应该有自己的一个缓存区。
diskPersistent:是否缓存虚拟机重启期数据,设置成true表示缓存虚拟机重启期数据
diskExpiryThreadIntervalSeconds:磁盘失效线程运行时间间隔,默认为120秒
timeToIdleSeconds: 设定允许对象处于空闲状态的最长时间,以秒为单位。当对象自从最近一次被访问后,如果处于空闲状态的时间超过了timeToIdleSeconds属性值,这个对象就会过期,EHCache将把它从缓存中清空。只有当eternal属性为false,该属性才有效。如果该属性值为0,则表示对象可以无限期地处于空闲状态
timeToLiveSeconds:设定对象允许存在于缓存中的最长时间,以秒为单位。
当对象自从被存放到缓存中后,如果处于缓存中的时间超过了 timeToLiveSeconds属性值,这个对象就会过期,EHCache将把它从缓存中清除。只有当eternal属性为false,该属性才有效。
如果该属性值为0,则表示对象可以无限期地存在于缓存中。timeToLiveSeconds必须大于timeToIdleSeconds属性,才有意义
memoryStoreEvictionPolicy:当达到maxElementsInMemory限制时,Ehcache将会根据指定的策略去清理内存。可选策略有:LRU(最近最少使用,默认策略)、FIFO(先进先出)
添加配置
在 application.properties 文件中启用二级缓存
1 | spring.cache.type=ehcache |
添加配置类
1 | package cn.psvmc.zapijpa.cache; |
代码配置
在Application上添加@EnableCaching,开启缓存。
设置缓存
1 | import cn.psvmc.zapijpa.entity.UserEntity; |
Controller
1 | import cn.psvmc.zapijpa.entity.UserEntity; |
访问
http://localhost:8080/user/get_user
http://localhost:8080/user/get_user2
http://localhost:8080/user/add_users
这样上面的两个请求都会在第一次的时候查询数据库,后面的请求都用的缓存。
超时时间未生效
关键的问题在于没有指定缓存类型为ehcache,ehcache.xml文件压根就没有生效。
springboot使用默认的SimpleCacheConfiguration,不是用的ehcache。
解决方法如下:
application.properties添加如下
1 | spring.cache.type=ehcache |
Redis
添加依赖
1 | <!--redis jar包--> |
在Application上添加@EnableCaching,开启缓存。
添加配置
1 | spring.cache.type=redis |
配置类
注意:
配置缓存管理器CacheManager有两种方式:
- 方式1:通过RedisCacheConfiguration.defaultCacheConfig()获取到默认的RedisCacheConfiguration对象,修改RedisCacheConfiguration对象的序列化方式等参数。
- 方式2:通过继承CachingConfigurerSupport类自定义缓存管理器,覆写各方法。
两种方式任选其一即可。
方式1
默认序列化在redis中保存的类似于这样,不太好排查
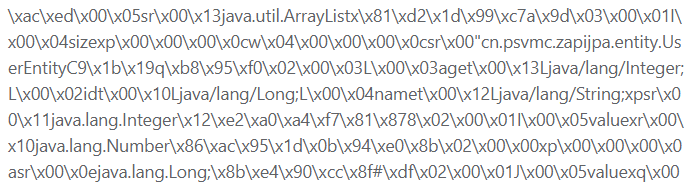
我们可以自定义配置类设置序列化方式
1 | package cn.psvmc.zapijpa.cache; |
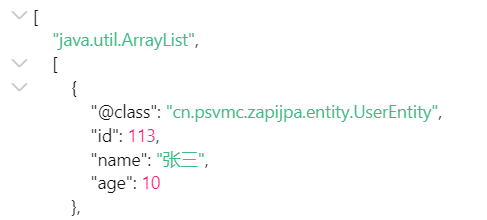
这样序列化的结果就方便查看了。
方式2
继承CachingConfigurerSupport的方式。
1 | package cn.psvmc.zapijpa.cache; |
配置文件中添加
1 | cache.expireTime=600 |
代码配置
代码配置和上面一样就行
注意一点实体类必须实现序列化,如果自定义了配置类中大的序列化方式则不用实现。
1 | public class UserEntity implements Serializable { |
缓存失效时间
上面设置了全局的缓存失效时间
我们可以设置通过代码设置缓存的失效时间
1 | import org.springframework.beans.factory.annotation.Autowired; |
但是因为最终生成的的key是拼接的,目前没找到好的设置的方法。
缓存注解
启用缓存
需要缓存的地方在类上添加@EnableCaching
添加缓存
在方法上添加@Cacheable(cacheNames = "userService.getUserByName",key = "#name")
其中
cacheNames时缓存的名称也可以使用value,使用Ehcache的时候,如果和XML配置中的对应,可以生效对应的规则,如果不对应会使用默认规则。key如果方法有参数,可以放在key上。这样参数不同都可以产生新的缓存。
缓存名称规则
缓存最终生成的key的规则是
prefix+cacheNames+”::”+key
其中
- cacheNames是必须要设置的
- key可以不设置,默认是根据方法的参数的值拼接的。也可以自定义默认的生成规则,或者指定生成器。
删除缓存
删除缓存@CacheEvict(cacheNames = "userService.getUserByName",allEntries = true)
当执行addAll的时候,因为用户改变了,所以我们清除缓存。
allEntries:是否清除这个缓存(cacheNames)中的所有数据。默认false。
无论我们缓存的时候是否设置了key,都要设置allEntries = true,否则无法删除缓存。
| 相关注解或概念 | 说明 |
|---|---|
| @EnableCaching | 开启基于注解的缓存 |
| @Cacheable | 主要针对方法配置,能够根据方法的请求参数对其结果进行缓存,缓存后再次调用方法则直接返回缓存内容。 |
| @CachePut | 保证方法被调用,并缓存结果。常用于更新数据。 |
| @CacheEvict | 清空缓存 |
@CacheConfig
所有的@Cacheable()里面都有一个value="xxx"的属性,这显然如果方法多了,写起来也是挺累的,我们可以在类上声明@CacheConfig
声明后在方法上只需要添加@Cacheable就可以了。
1 | (cacheNames = "user") |
注意注解引用的类
1 | import org.springframework.cache.annotation.Cacheable; |
条件缓存
1 | //@Cacheable将在执行方法之前( #result还拿不到返回值)判断condition,如果返回true,则查缓存; |